|
Fuel tank installation on our Project ’69 Buick Special, Part 2
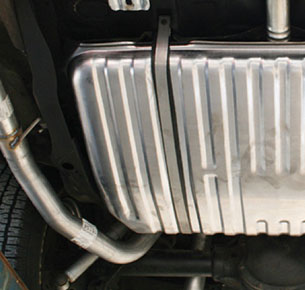
Last segment of Colin’s Corner, we started the new fuel tank installation on our Buick. We had just finished removing the 41 year old tank, and had treated the underside (now sans fuel tank) to a few coats of 3M Underseal Rubberized Undercoating. Here’s how it all looked when we last left off.
The new fuel tank from Original Parts Group. This is OPGI's Part# AD0GM4C, and is an exact replacement unit for 1968-69 Buick Skylark models.
|
|
|
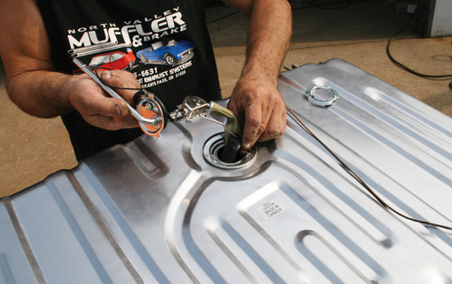
Russ Rosenthal from North Valley Muffler & Brake in Grants Pass, Oregon
installs the new fuel sending unit OPGI Part# PZ00734 in the fresh tank.
|
|

The retaining ring twists into place, securing the sending unit in
position in the top of the tank’s opening.
|
|

The power connection is affixed to the terminal on top of the sending unit.
|
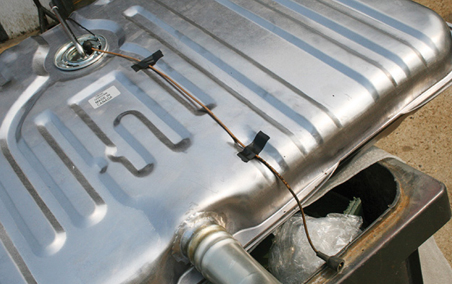
This is how everything should look, all prepped to go back in the car. The wire is affixed with
electrical tape, and will plug back into the rear wiring harness behind the bumper.
|
|
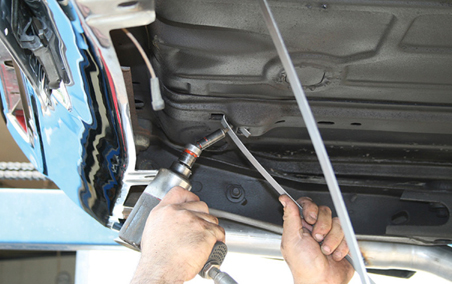
Since our original fuel tank straps were just about as gnarly as our tank,
we used the new ones from OPGI Part# PZ00723.
|
|
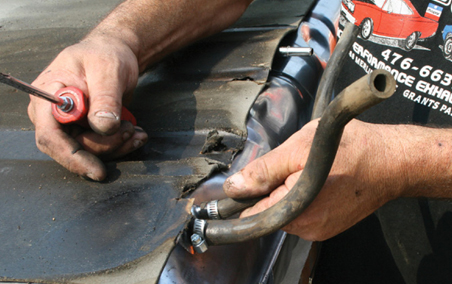
We forgot to order a new chunk of Dynamat insulation for the top of the tank. We ended up re-using our old one. The original breather hoses are utilized as well. All were in good shape.
|
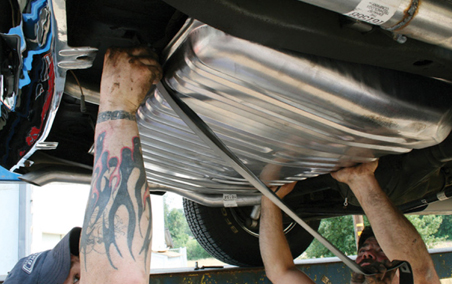
Brent and Russ get the new tank into position. Here, Brent is making sure the new anti-squeak rubber strips OPGI Part# G54883 are fitting properly between the mounting straps and tank. You can see how this is not a one-man job!
|
|
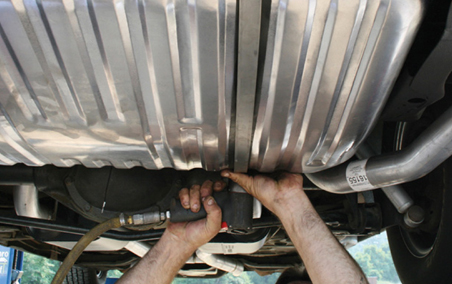
The new tank is secured by tightening up the strap bolts.
|
|
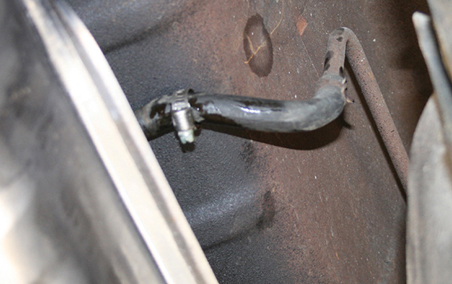
The hard line coming off the tank (out of the sending unit) is connected back to the main fuel line.
We also connected the ground wire leading off the sending unit to its original spot
on the Buick’s undercarriage.
|
|
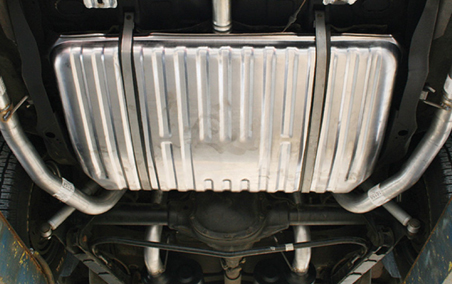
Here we are, all done. The shiny new tank matches that slick trick exhaust system nicely huh? It especially looks great against the freshly undercoated trunk pan section. We fed the approximately 5 gallons of fuel we had in our old tank to our new one. Vast improvements, one step at a time.
|
|
Source:
North Valley Muffler & Brake
3388 Merlin Road, Unit C
Grants Pass, OR 97526
(541) 476-6631
|
|
 |
|
by Jessica Fegan
You’ve been preparing for this show all year. Your hotel reservations have been made for months and you and your buddies came out a day early to make sure you’d get to the show early to secure the best spots. You haven’t been working on her all year to park her in the back row. Waking up this morning wasn’t hard, even though falling asleep last night was. You quickly scan the hotel room to make sure you have everything you need. Polish - check. Favorite cloth - check. Keys - check. You’re all set. You grab a coffee and a Danish from the lobby and you and the boys are on your way. As you leave, everyone teases you about winning best in show, but you know it’s yours. You get out to the parking lot and everyone disperses to their rightful vehicles. You look at the spot where you’d left her the night before. It’s empty. You stop dead in your tracks and blink in disbelief, quickly convincing yourself that you must have forgotten about moving her. Panic starts to set in. Your heart is racing, palms sweating. You frantically scan the parking lot and she’s nowhere in sight. This cannot be happening.
Sadly, the nightmare described above is too often a reality in the insurance world. However, if you read on, you’ll learn how to make sure a scenario like this doesn’t turn a nightmare into a real-life horror story. It all starts with choosing the best insurance provider that will properly suit your needs.
Before beginning your hunt for the ideal insurance for you and your vehicle, it’s essential to understand what you should be looking for in an insurance provider. Many enthusiasts aren’t aware that there is insurance designed specifically for collector vehicles. Collector vehicle insurance policies can differ greatly from policies for daily drivers or other types of vehicles. Because collector vehicle policies are tailored specifically for enthusiasts, there are many advantages to this type of policy. Here is an overview of what you should look for in your search for auto insurance.
Standard vehicle policies vs. collector vehicle policies
One of the most important differences between how you insure your daily driver and how your collector vehicle should be insured is the type of physical damage (comprehensive and collision) coverage the policy offers. On a policy for a daily driver, the comprehensive and collision is paid on an “Actual Cash Value” (sometimes called ACV) basis. These types of policies are undesirable to collector vehicle owners because they will either depreciate the value of your vehicle as time goes on (when in actuality, collector vehicles usually appreciate in value over time) or they will not place a value on the vehicle unless there is a claim. “Agreed Value” is the only type of physical damage coverage that guarantees the full-insured value will be paid in the event of a total loss, with no depreciation. You and your insurance company determine the vehicle’s worth and agree upon its value at the inception of the policy. As a collector vehicle owner, you should make certain this is the type of policy you have or when there is a claim, you may end up receiving far less than what your vehicle is really worth. For instance, in a “Stated Value” policy, the insurance company is only required to pay “up to” the stated amount on the policy, which could mean the policyholder may not get the full value of the vehicle in the event of a total loss (such as a theft, like in our nightmare scenario). Scary thought.
The second most noticeable difference between standard vehicle insurance and collector vehicle insurance is the cost. Collector vehicle insurance is typically a fraction of the cost of standard vehicle insurance. Two factors that play into much lower rates are the responsible and safe nature of collector vehicle owners and the fact that collector vehicles are used in a different fashion than daily driven vehicles. This translates into lower rates.
The third major difference are the perks that come along with collector vehicle insurance that most standard vehicle insurance policies don’t offer. Many collector vehicle insurance companies have comprehensive towing and labor reimbursement programs set in place. This means if you need a tow, you can select the towing service of your choice, and send along the bill for reimbursement. Some will only charge one liability charge - regardless of how many vehicles you have on the policy - which can mean big savings for collectors with multiple vehicles. And some companies will give you automatic 30-day coverage for new additions to your collection.
How can you qualify for these great insurance programs? Well, in order to qualify for most collector vehicle insurance programs, you’ll have to agree to a few things. First, you have to agree to keep your classic in a garage when it’s not being used. You’ll also need to have other cars in the household that are used for general transportation, so the insurance provider knows the collector vehicle isn’t being used for that purpose. Some companies impose annual mileage limitations, which can be a real downer for some enthusiasts. However, with some insurance companies, there are no strict mileage limitations in most states. Coverage is available as long as you use your regular car(s) for everyday driving and your collector vehicle on a limited basis (for pleasure rides, hobby activities, exhibitions, etc.).
Determine your needs
Sit down and really think about your needs and if your vehicle fits the requirements of the insurance company you’re looking into. Some providers will only deem a vehicle a “collectible” if it’s of a certain age (usually 15 years or older). However, there are factors, other than just the age of the vehicle, that can make it a collectible. What about highly modified vehicles, exotics, new limited-production vehicles, or kit and replica cars? There are a small amount of collector vehicle insurance companies which will consider insuring any make/model and model years. You have to do your homework here.
What if you have a car you’re working on in parts all over your garage? While it may not even resemble a car right now, you know that the value of all those parts is substantial. If you have a work in progress, you should see if the insurance provider is willing to cover the car for comprehensive only and then add collision and liability for full-coverage once the vehicle is in a drivable state. The cost will be minimal and you’ll be protecting your investment in the event of fire, theft, vandalism, windstorm, glass breakage, and other damages that may occur.
Other things to consider
If you’re shopping around, you’ll want to notice other factors. How is their customer service from the get-go? Did you get a machine or were you able to speak with a real person? Were they friendly, knowledgeable, and expedient? This is indicative of how the company will respond if you ever have to file a claim. What other bells and whistles are they offering you? Some companies will let you pick a repair shop of your choice when you have a claim. This is something many collectors view as a necessity. Others offer spare parts coverage for those new exhaust tips in the garage that you have yet to install. Also, compare the other bells and whistles side by side and read the fine print. Are they really comparable? Will your company allow you to adjust the Agreed Value of your classic after the policy is set? That is important, as we all know how fast collector vehicles can change in value.
Most people only think about insurance once a year when their policy is up for renewal. If you take the time to research what’s available to you and make an educated decision, you’ll be pleased with what you’ll get in return for your efforts.
Tips to prevent the worst case scenario
1. Join a car club! A thief may try to sell your stolen vehicle to someone who has similar interest in a car like yours. Club members are often very unified and would keep an eye out for a fellow club member who has lost his or her car.
2. Always lock your car, close all windows, and never leave valuables in plain sight. This is an open invitation for thieves!
3. To prevent an accident, dedicate a special section of the garage to your collector vehicle and keep lawn tools, paint cans, the kids’ bikes, etc., in another location.
4. Never hang anything over or near your collector vehicle. When dry wall deteriorates and screws loosen, it’s only a matter of time before an accident.
5. Inspect shelves in the garage on a regular basis to make sure they are still secure. Loose screws or bowing in the middle is a sign that the shelf is straining to support the weight being placed on it.
6. Use good judgment when driving your vehicle. Most accidents happen during rush hour and in crowded parking lots. Be extra careful in these situations!
Ask some of your friends and fellow car enthusiasts who they insure their rides with. With a little detective work, you’ll select the right company and add some much needed peace of mind to your collector car hobby.
|
|
 |
|
Underhood restoration
As most of you are probably now aware, our 1969 Buick Special project car is in the midst of a major restoration. The car has been completely repainted, and while that was taking place, the hood and deck lid were removed (and painted separately).
The underside of the car’s hood was super nasty, never having been touched in over 4 decades. With the hood removed, now was the time to get down and dirty, and restore the underside to its factory fresh appearance.
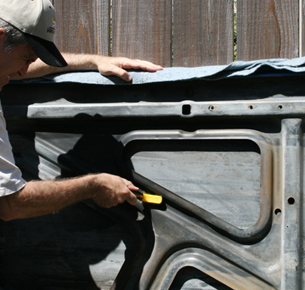
With the top side of the hood completely masked off, we set the hood against a fence. We used a couple of wood blocks to set the hood on— keeping it off the actual ground.
Here I’m using a wire scrub brush to remove grease, grime, overspray, and various other debris that makes the underside of the hood look downright terrible.
|
|
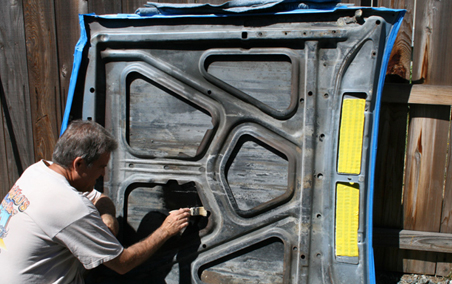
A small section had some semi-serious rust happening. Nothing to get too excited about, but left unchecked, over time this could have led to perforation. On a freshly-painted hood, that would have, well, sucked. Some light wire-brushing, followed up with a couple of coats of POR-15 OPGI Part #C220222, and all was right once again. In case you haven’t heard, POR-15 is a rust preventative paint that stops rust in its tracks.
A must on projects like these.
|
|

As a final cleaning prep, I took some 0 grade steel wool over the entire project.
|
|
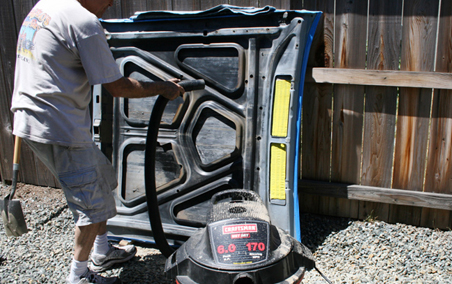
Before priming, I used a shop vac in the “blowing” mode, and blew off paint dust, steel wool debris, etc.
|
|
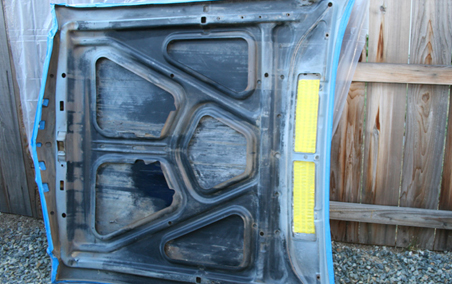
Here’s our hood, with a plastic sheet taped up behind it. We wanted to paint the hood, not our fence. At this stage, we took a rag and some de-greaser and wiped everything down again. As you can see, the yellow tape is masking off the hood’s vent slots. We also taped up the holes in the leading edge of the hood where the B U I C K letters attach from the top side.
|
|

One can of Rust-oleum’s Rusty Metal Primer provided a nice base for our top coats.
|
|
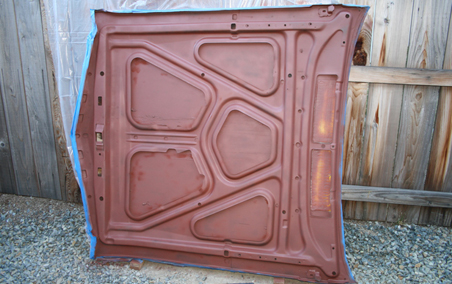
It took about a hour to completely dry. By the way, we’re spraying in the early evening,
ambient temperature approximately 75F. Perfect.
|
|

Time for our top coats. The folks at Eastwood Co. supplied us with 2 cans of their Underhood Black paint (Part #10024 Z) in aerosol format. The first can sprayed out nicely, the second can, not so much. A bad spray tip was the culprit. Two 11 oz. cans turned out to be nowhere near enough paint either. So, we relied on our trusty favorite AeroPRO (#5933) semi-gloss acrylic enamel to finish the job. Eastwood’s Underhood Black (ignoring the bad spray nozzle part) is actually a pretty nice paint, and provides a smooth semi-satin finish. It took 3 cans of AeroPRO to finish the job though. Basically, we ended up using Eastwood’s paint as a primer.
|
|
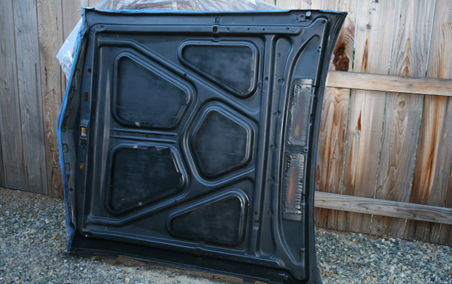
The hood, painted. Final tally: One can of rust primer, 2 cans of Eastwood Underhood Black, 3 cans of AeroPRO semi-gloss. And as you’ll note in the photo, we only went light on the coats where the hood insulation is going. So, if you’re planning on doing this kind of job by yourself with “rattle cans”, make sure you pick up lots of paint—hoods are very large pieces of sheet metal!
|
|
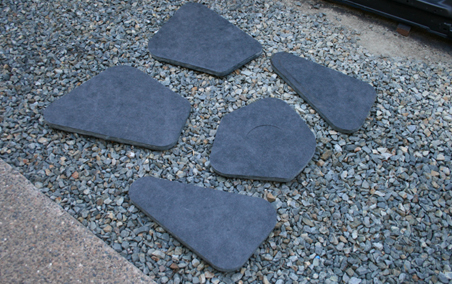
Original Parts Group provided the Skylark Underhood Insulation Kit OPGI Part #S210017,
for 1968-72 Skylark. This stuff is great! It’s an exact replacement part made of flame resistant fiberglass material, and it’s cut to fit our Skylark’s underhood cut-outs perfectly.
|
|
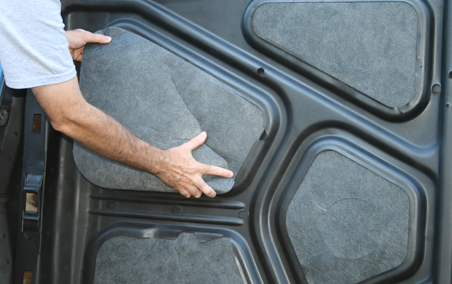
The individual sections have to be bent slightly to secure them into the hood’s
individual recesses. It’s an easy job, and the end result looks great.
|
|
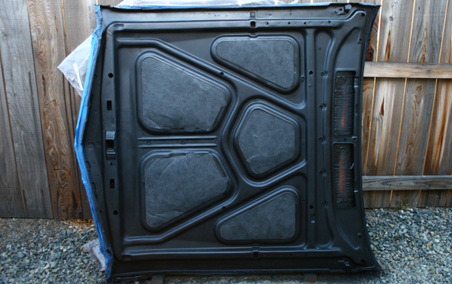
All done. To finish off, we’ll remove that tape that was masking the hood’s vents,
and paint in between the vents using a small brush.
|
|
We’ve had our hood hinges professionally restored too,
so that hood is going to look fantastic when we bolt it back up!
|
|
 |
|
Tire cleaning, 101
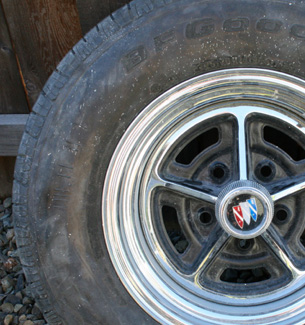
This may seem like a super simple little project, but believe me, when your tires have been coated in primer overspray, it’s not.
Our project Buick went into the paint and body shop a few months ago, and emerged a new man. Problem is, the car was in the shop undergoing bodywork, primer, more bodywork, more primer, some finessing bodywork, a little more primer…well, you get the idea.
Our Buick was moved around in the shop (a lot) over the course of the months, and quite often, our wheels and tires were the unlikely recipient of some nasty overspray, rubbing compound, etc.
|
|
Our tires are BFGs, the original factory 14” size, and our wheels are Buick Rally Wheels from Wheel Vintiques. Both are approximately 5 years old, but after the beating they’ve taken over the past few months, they look worn out — definitely not show-ready.
We’re going to show you a few tricks to get rid of overspray on tires, and make them look brand new. Be forewarned: this is not an easy task. It’s simple, sure, but it takes plenty of elbow grease, and approximately 1-1/2 hours per tire. Here we go…
|
|
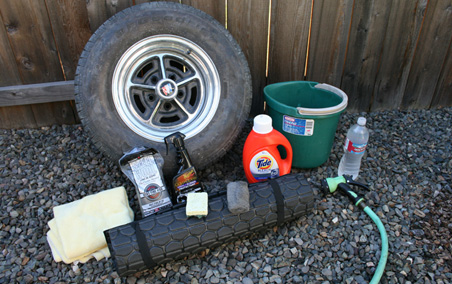
Here’s our “beauty” shot: Our wheel and tire, a few rags, a mat (for kneeling on),
some 00 grit steel wool, a scouring pad, some Tide (with bleach), a bucket, garden hose,
some Meguiar’s Gold Class Vinyl/Rubber Protectant, and that bottle of water was for me.
I’m doing this in about 80F heat, but in the shade.
|
|
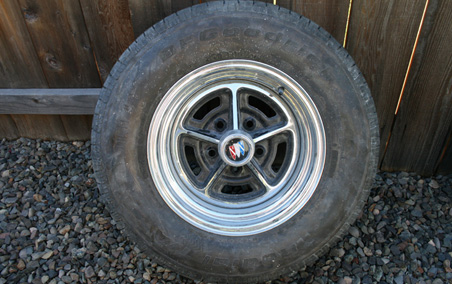
Here’s our “before” shot. That nasty overspray is a tough one, but we’ll git’er done.
|
|
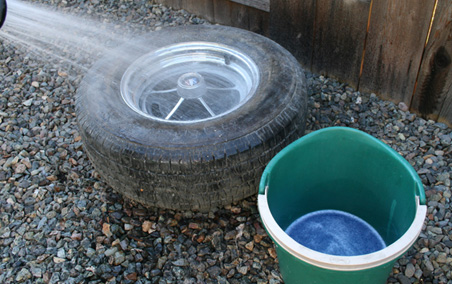
First step, hose that wheel and tire down. In the bucket: two capfuls of 2X Ultra Tide with bleach, mixed with about a quart of hot water. This is a super concentrated mix. You should use gloves during this project. We didn’t because, quite frankly, we forgot. The Tide won’t hurt your skin, but it does take a couple of days to get your hands feeling normal again. Your hands feel sticky and no amount of washing seems to get rid of it, just time.
|
|
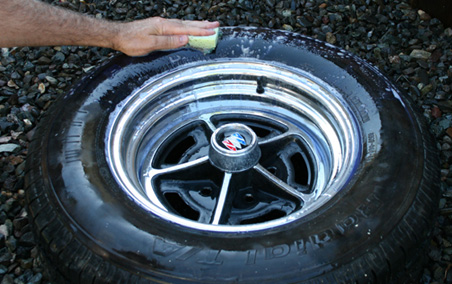
Using a scouring pad dipped in the Tide mix, we start rubbing in a circular motion.
The suds immediately turn brown from just plain ol’ dirt.
|
|
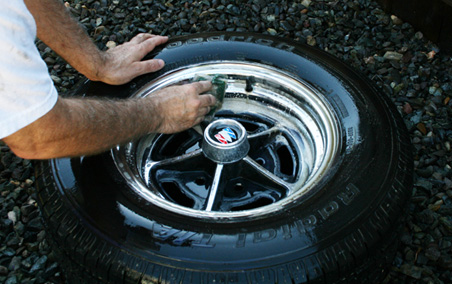
We’ll also take our first shot at the wheel at this point. We don’t use the hard side of
the scouring pad, just the soft portion to remove loose dirt.
|
|
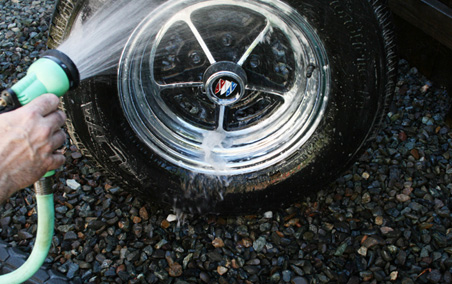
After a good initial scrubbing, we hose the wheel/tire down and get a look at what we’re up against.
|
|
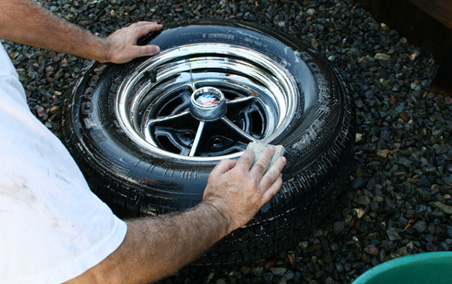
We’re nowhere near clean yet. Another round with the scouring pad.
|
|
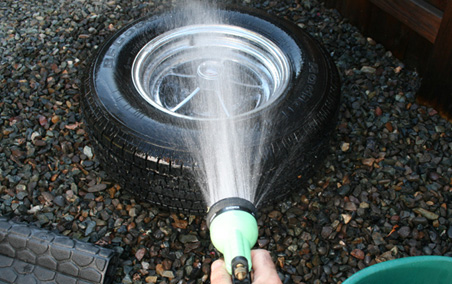
We hose the wheel/tire down again…
|
|
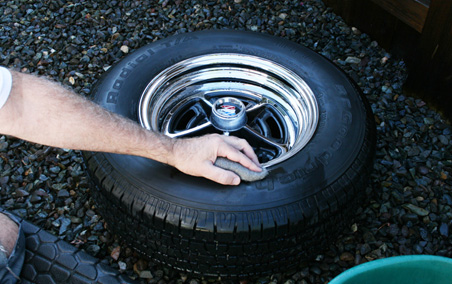
A few stubborn spots of overspray get taken care of with a pad of 00 grit steel wool.
We recommend using the 00 stuff. Anything much coarser and you run the risk
of permanently scratching the tire’s sidewall.
|
|
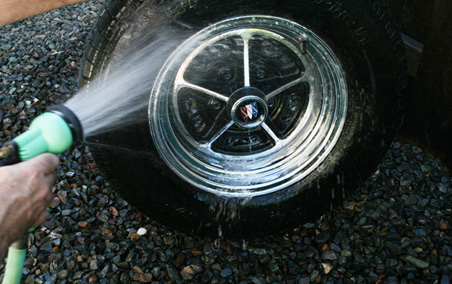
Another complete rinsing.
|
|
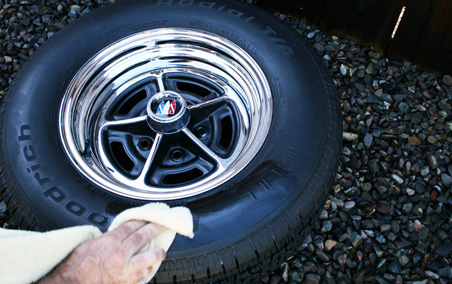
After drying off the wheel/tire, we take a clean,
soft cloth and spray a healthy dose of Mequiar’s Protectant on it.
|
|
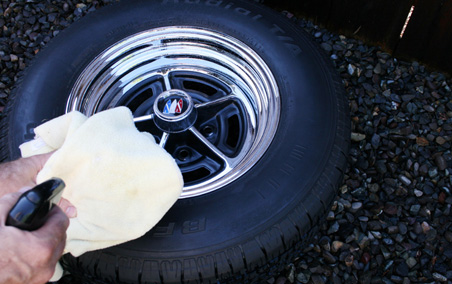
Rub the Mequiar’s in a circular motion into the tire’s sidewall.
We did 3 separate “coats”, one right after the other.
|
|
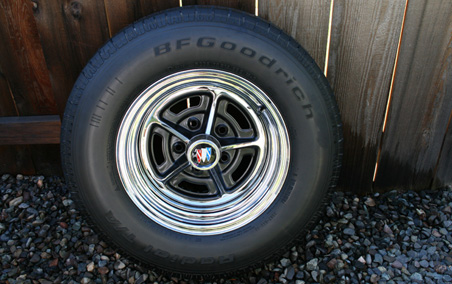
Done. The wheel and tire both look practically new. Elapsed time is well over an hour, but we think you’ll find the extra effort well worth it all when you see that nice new wheel and tire on your ride!
|
|
|