 |
|

By Dick Rozum
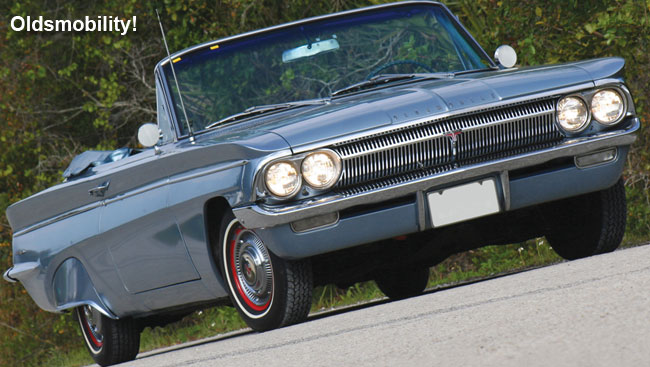
Prior to 1960, the big three American automakers built cars with a pretty much one size fits all theme. This would quickly change in the sixties. America’s leading automaker was quick to join in the race for a new size car. Chevrolet had the exotic new rear engine Corvair, while Oldsmobile, Pontiac and Buick came up with their own more conventional smaller cars, the F-85, Tempest and Special all sharing the same new A-body platform.
With a wheelbase of 112” and an overall length of 188.2”, the F-85 was the smallest and lowest priced Oldsmobile, some two feet shorter and $451 cheaper than the next lowest priced model in the Olds lineup. For 1962, the F-85 series came in a full array of models from the base Club Coupe, Deluxe Sedan, Deluxe Station Wagon and Sport Convertible, to the sporty and luxurious Cutlass Coupe and Convertible.
The new F-85 features unibody construction with Pivot-Poise Counter-Dive double-wishbone front suspension and rear coil springs with 4-Link Stabilizer Control live axle. In typical Oldsmobile fashion, standard power comes from a 215 cubic-inch Rockette V8 (the standard V8s in the little Olds were called “Rockette”, while the standard V8s in the larger Oldmobiles were called “Rocket”), mated to a standard 3-speed synchromesh transmission or optional 4-S Hydra-Matic Transmission. The new Ultra-High Compression Cutlass 185 engine is standard on all Cutlass models. Later in the model year, Oldsmobile introduced a new Jetfire model with its turbocharged version of the 215 V8 rated at 215 horsepower.
Our feature car is the base F-85 Sports Convertible. Optional features on this F-85 include Hydra-Matic ($189.00), Power Steering ($86.08), Back-Up Lamps ($10.71), Inhibited Year Round Coolant ($4.35), Outside Rearview Mirror ($4.51), WSW Tires ($29.75), Tinted Windshield ($19.91), Power Top ($53.80), Safety Padded Instrument Panel ($12.91), Foam Padded Front Seat Cushion ($9.68), Exterior Body Moldings($33.36) and Deluxe Radio, Windshield Washer and 2-Speed Wiper and Deluxe Steering Wheel Package ($95.08). It all adds up to a compact convertible with upscale features and styling.
|
|
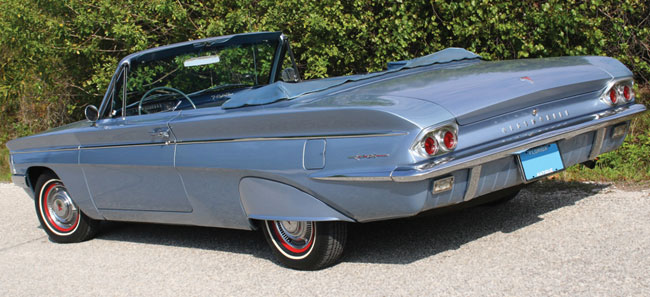
Owners Jim & Shirley Crawford of St. Cloud, Florida, enjoy driving this handsome ragtop and it’s quite a hit at the local car shows. Jim tells us that he believes there were only 3,660 F-85 Sports Convertibles produced during the 1962 model year, while the more popular Cutlass Convertible racked up sales of over 9,000. The Crawford’s have personalized their F-85, adding accessory fender skirts and red painted wheels. The red trim on the wheels blends nicely with the red accents on many of the emblems found on the car. Other than one new paint job and a new top, this F-85 is in all-original unrestored condition with only 80,018 original miles on the odometer.
With tasteful good looks, roomy attractive interior, sparkling performance, and quick and responsive handling, the F-85 Sports Convertible is certainly the smaller car with that “something extra.” Fun to drive and every quality inch an Oldsmobile; it’s called “Oldsmobility!”
|
|
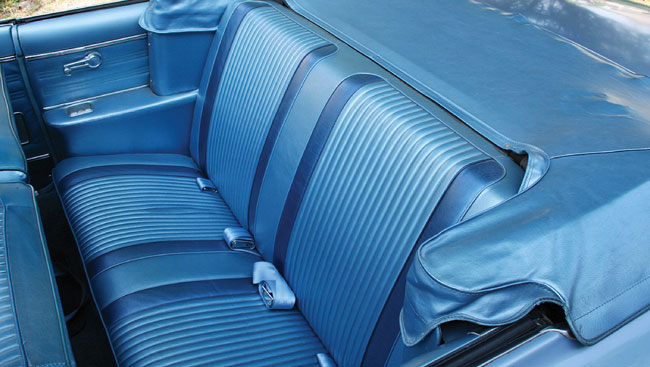
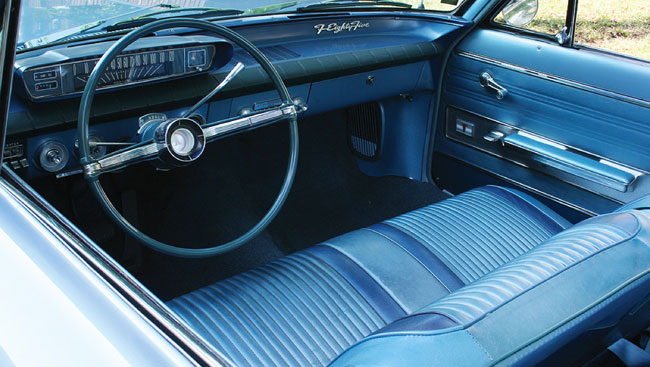
One look at the stylish F-85 Sports Convertible interior and you know this is an upscale smaller car. The insides are trimmed in Oldsmobile fashion with gleaming trim on the door panels and plushly pleated two-tone vinyl trim on the standard full-width bench seat. The F-85 featured here has the optional Safety Padded Instrument Panel and Deluxe Steering Wheel, adding to the attractive interior.
Gauges are limited to speedometer, clock and fuel, with warning lights provided for generator, engine temperature, and oil pressure. All instrumentation is neatly stylized into one oval pod directly in front of the driver.
|
|
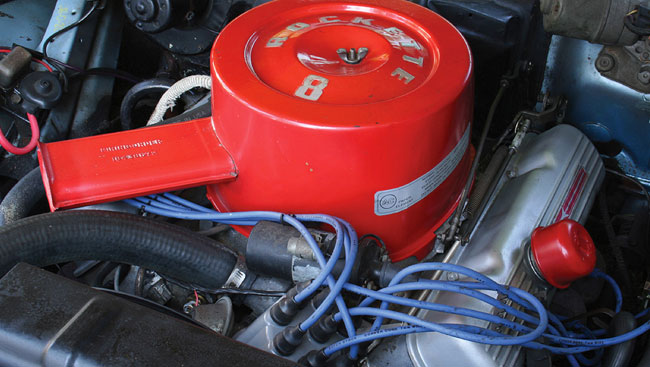
No engine can match a V8 for smoothness and performance, and it’s standard on the
F-85. The 215 cubic-inch delivers 155 horsepower at 4,800 rpm and 210 ft.lbs. of torque at 3,200 rpm. Compression ratio is 8.75:1 and bore and stroke is 3.50” x 2.80”. Low-cost regular gas is fed through a 2-barrel carburetor.
The Rockette V8 is a lightweight aluminum design giving it a highly efficient power-to-weight ratio. The lighter weight of the aluminum engine also adds new balance to the F-85, giving nimble handling.
Oldsmobile refers to the unusual shaped air cleaner as a “helmet” to protect the carburetor from dirt and grime.
In 1962:
• Average income $5,556 per year
• Average new car cost $2,924
• Gasoline is 28 cents per gallon
• Television favorites were “The Beverly Hillbillies”, “Ben Casey” and “The Dick Van Dyke Show”
• John F. Kennedy was President
• Popular songs included “Big Girls Don’t Cry” and “Duke of Earl”
|
|
 |
|
Prepping the engine bay on our 1969 Buick Special project car
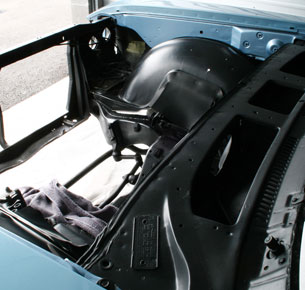
To me, this is the nastiest part of restoring a car. I’m talking about making it look pretty under the hood. There really is only one way to do it — the right way — which is both time consuming and expensive.
Of course, the engine has to come out. By the way, our all-original 350 2 bbl. is on an engine stand getting restored. It’ll get treated to all new seals, gaskets, etc. and new paint. I should have an update (and pics) for you next CC!
|
|

So, with our engine out of the way, we’ve scrubbed down the firewall and cowl (with de-greasers and a Scotch Brite pad), and treated them to 4 coats of semi-gloss black. This brand (AeroPRO) came highly recommended, and wow, it does a wonderful job. Sprays out beautifully, with very even coverage.
|
|
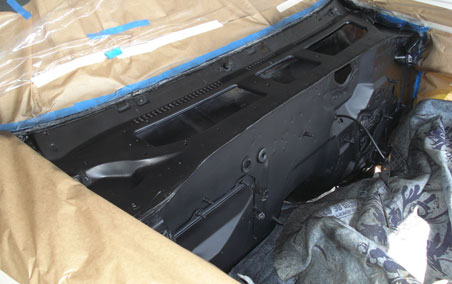
Of course, we’ve masked off the entire front clip to avoid any overspray or drifting paint.
|
|
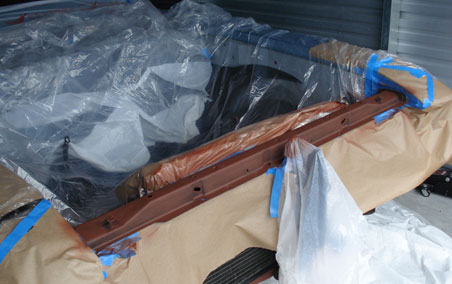
We also painted (with the same semi-gloss black) the top of our core support. What you see here is Rustoleum’s Primer. We had some surface rust happening, so it was scraped, sanded, and squirted.
|
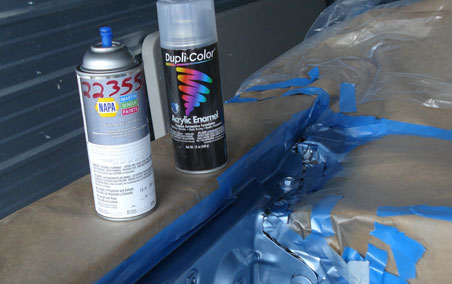
We also painted the insides of the fenders, since they were accidentally masked off when the car was repainted. We found out that NAPA Auto Parts will custom mix your car’s color and put it in an aerosol can for you, for $20! Heck of a deal. After 3 coats (and 24 hours drying time), we clear coated the panels using Dupli-Color’s Clear.
|
|
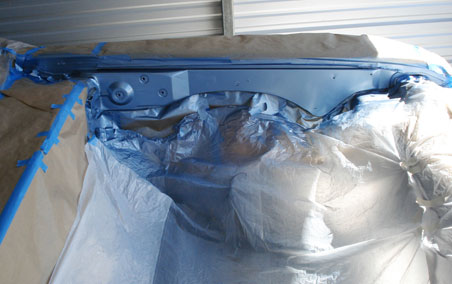
Factory correct, lookin’ clean!
|
|
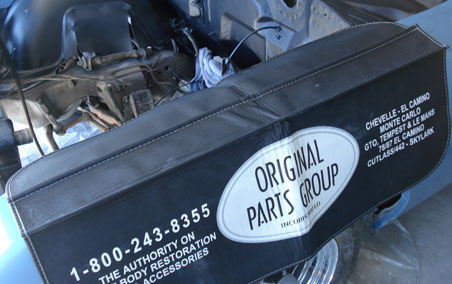
OPGI’s fender covers Part #PADLFC2 came in real handy for this next step: leaning in and out of
the engine bay scrubbing the frame rails.
|
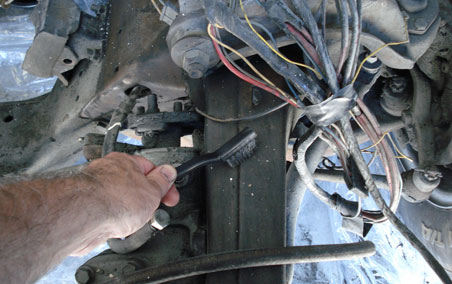
This is one arduous task. If you’re tackling this one yourself, make sure you have a drop sheet under the area. 41 years of grease and grime really can make a mess of your garage floor. We used wire scrub brushes, and finished the cleaning with a de-greaser.
|
|
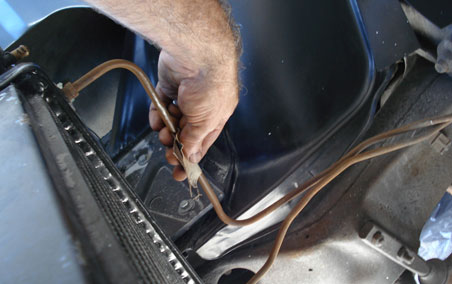
We started cleaning up the transmission cooler lines with a 60 grit sandpaper, then steel wool, then gave up. Too much corrosion to deal with. A quick fix was to order up a set of new trans cooler lines from Original Parts Group. Part #SK00005.
|
|
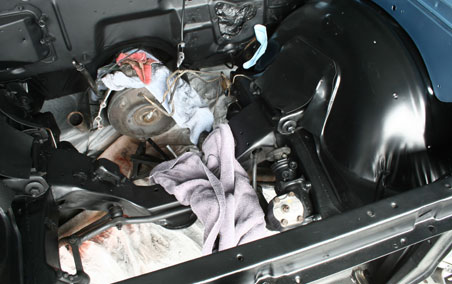
Our frame rails have been sprayed with the aforementioned semi-gloss black, and we’ve installed our driver’s side inner fenderwell (which has been powder-coated). The A-arm seals are from OPGI. Fenderwells for the Buick A-bodies are not being reproduced, yet. So if yours are in even mediocre shape, hang onto them and have them refinished!
|
|
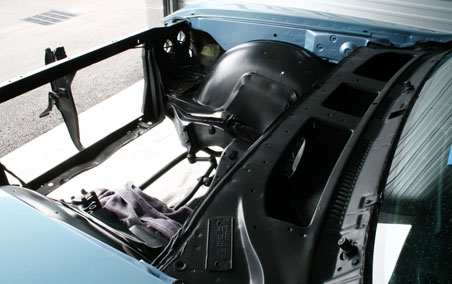
She’s lookin nice! That towel is holding our ratty old wiring harness, which is still caked in grease. OPGI supplied some nice new Wire Harness Tape Part #WR16133 so we’ll have those wires wrapped real nice, real soon.
|
|
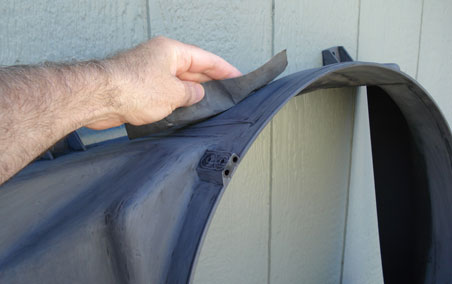
When we bought our Special back in 2002, it came missing a fan shroud. We found one on eBay that was in pretty nice shape, but in need of a little TLC. The shroud was sanded with a 600 grit paper, de-greased, then painted…
|
|
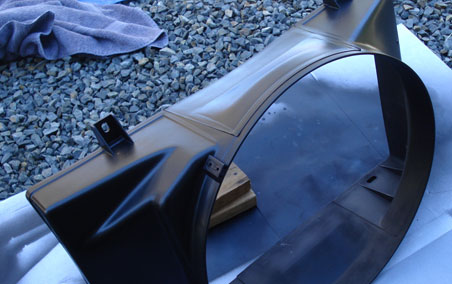
4 coats of SEM’s Flexible Bumper Coater paint worked real nice. We used the same paint on our Radiator Top Plate. This paint does have a tendency to clog the nozzle and spray out in spots, so use caution. Shake the can thoroughly (at least 2 minutes) and use in 70F temperatures. If applied properly, the end results are awesome.
|
|
We’ll continue with updates on the project Special in the next Colin’s Corner, see you then!
Next Month: Engine painting, more engine bay detailing.
|
|
 |
|
Fuel tank installation on our Project ’69 Buick Special, Part 1

Man, is this UGLY or what? Granted, looking at the car from directly behind, the disgusting fuel tank is not completely visible. But just knowing how hideous it really is sparked (poor choice of words) me to do something about it.
If you’ve been following along on the restoration of our ’69 Buick, you’ll know that I intend to put this baby pretty much back to stock. Of course, we’re doing a few subtle mods here and there, just to make our ride unique.
|
|
Last issue of CC, we installed the shiny new dual exhaust system that you see in the photo. Once we got the car up on the rack, the fuel tank’s actual condition became painfully obvious. As with just about everything else on this car, the tank was all original as well.
I called my old buddies at Original Parts Group and they shipped me everything I needed. OPGI’s fuel tank (part# AD0GM4C) is an exact replacement unit for this Buick featuring all the correct original GM factory stamping, and of course, the 20 gallon capacity.
If you’re tackling this project on your own ’68-’72 GM A-Body, make sure you check OPGI’s catalogs or the website (www.opgi.com) for your specific application. I mistakenly thought the fuel tanks would be the same across the A-Body line up - wrongo! It pays to double check.
|
|

Russ Rosenthal from North Valley Muffler & Brake in Grants Pass, Oregon, did the dirty work for us. Hey, he’s got a lift, we have jack stands. Simple decision. Russ starts by disconnecting the two vent hoses that are located near the top of our old tank.
|
|
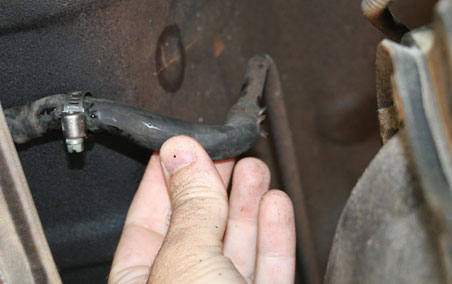
The flexible hose that connects the hard fuel line to the line that comes off the
sending unit is removed.
|
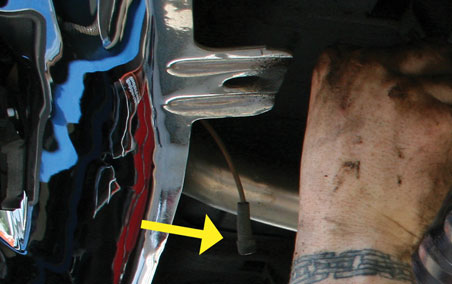
Next, we unplugged the connection that sends power to the sending unit.
This connects to the rear main wiring harness.
|
|
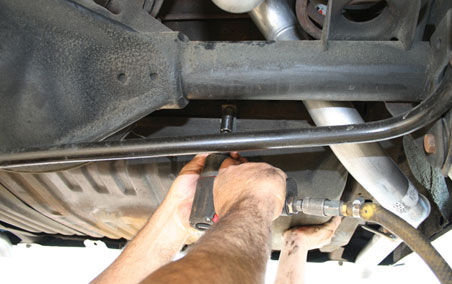
The fuel tank mounting straps are removed (two bolts each strap). Here’s where you’ll need another set of hands. Brent Howard supports the tank while Russ un-bolts the straps.
|
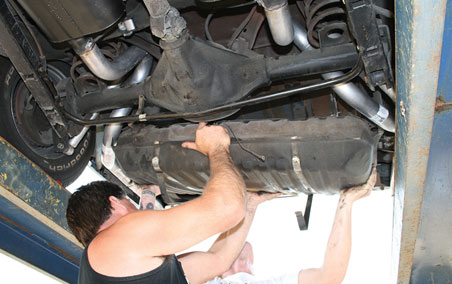
The grimy old tank is removed. It was about a 1/4 full of gas, which we eventually drained
and put into the new tank.
|
|
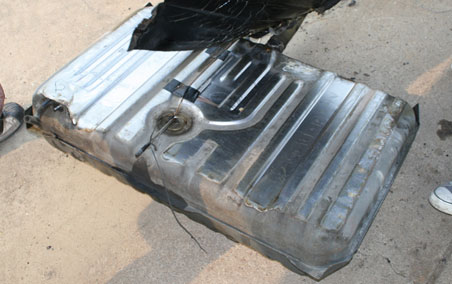
The original tank actually still looks pretty good from this never-seen view. The sound/rattle insulation pad was actually holding together quite well after almost 40 years of service.
|
|
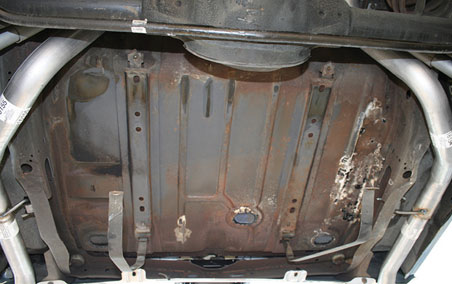
All that nastiness up there on the right side of this photo is the result of moisture collecting in the trunk over the years. Rotten weatherstripping was the culprit. Our Buick’s floor pans were very solid though, so we were fortunate. This above section of the trunk pan was another matter altogether. A fiberglass patch and some POR-15 fixed the problem area.
|
|

It’s not very often you have to remove your fuel tank, so while we’re presented with this golden opportunity, might as well use some 3M Underseal Rubberized Undercoating to take care of the area. The product description, from 3M’s website: “Rapid drying, paintable, rubberized undercoating material for rust-proofing and sound deadening. Ideal for coating fenders, quarter panels, door panels, repaired sections, welded joints, hoods, and decks”.
|
|
Next Month:
We’ll finish our story. OPGI’s beautiful new fuel tank is ready for prime time!
Source: North Valley Muffler & Brake
3388 Merlin Road, Unit C, Grants Pass, OR 97526
(541) 476-6631
|
|
 |
The Silver Shootout: A shooter from San Antonio gives us the lowdown on 18 shades of silver detailing paint.
By Jeff Lilly of Jeff Lilly Restorations
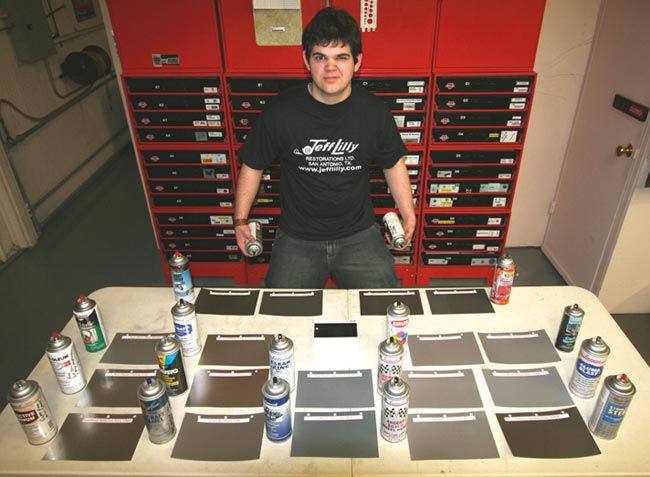 Shannon stands poised for the "Silver Shootout". 18 silver shades stand in our way to find out what’s what in the “Silver Squirt Corral”.
Street Rods and musclecars are built using a variety of paints and shades. Silvers play a big part when building your ride, so we’ll discuss what shades work best with natural aluminum parts such as intakes, alternators, A/C compressors, etc. Cast iron parts have the same dilemma, as choosing the correct shades makes the difference in looks and longevity.
Shaking aerosol paint is very important. Some brands settle out more than others and some paints mix up quicker than others. Cast iron silvers are especially stubborn due to the heavy pigments which allow heat tolerance. In addition, a cold can does not spray well and can clog up the nozzle - resulting in poor performance. We usually have no problems spraying in the summer months in Texas when it’s 90-100F out. Our winters here in San Antonio can range between 30-60F, which is not that cold compared to northern states - where lower temps can really affect the spray quality. So warm up a can well for best results.
If you need adhesion on aluminum or steel, before you put down any of the silvers (excluding high heat products like cast iron, etc.), this stuff is the best you can find in an aerosol can. Aviation suppliers like Falcon Crest have it, as do many other suppliers.
Apples to apples comparisons are the only true test. We use BASF spray cards (above) to test colors for coverage or coat quantity needed. They also give you a consistently smooth surface to determine if the metallic separation is what you’re looking for, and if the overall shade is satisfactory. You can purchase these and other spray cards like Dupont’s Checker Board at most local auto paint stores. Remember to test spray twice, and spray the part once!
An exhaust fan for adequate ventilation is important when spraying any kind of paint. Notice the infrared orange heater. This warms up the parts and the cans before spraying, which produces consistent results. If your parts are cold, the paint can run or take too long to cover properly - so be aware of your part’s surface temperature and seek a minimum 70F.
Eastwood 1283Z Reflective Aluminum: As seen in the reflection of the Sharpie pen, it is a good candidate for reflective paints. These types of silvers are generally used for dash bezel parts that were originally plastic chromed and taillights for bulb reflection. This brand has a very nice spray with a super fine mist and covers well in about 2-3 coats. Reflective paints are not the most durable, and if clear coated, a dulling effect will take place. So be sure to test if you opt for clear protection.
DAP 873: This paint flashes in a slow/dry time. We use this to duplicate original cyanide cadmium found on a lot of classic vehicles, as it is the closest thing I have ever seen that looks like real cad plating. Durability, like most reflective paints, is on the low side as seen in the finger nail scratch test across the test panel. Be very careful during assembly to avoid marking it. It does harden up somewhat after it sits for a couple of days. Quite a bit of reflection as seen.
Tempo 1140: Heat range is 250F. This paint mottles quite a bit during spray out and has a slow flash/dry time. The adhesion is excellent as is all Tempo aircraft aerosols. It has a certain look that can be used for a variety of parts if you can overcome the spray out problems. Some reflection as seen with the Sharpie.
Rustoleum 7718: This is the most reflective paint I have seen out of an aerosol can. As seen by the Sharpie pen reflection, it is pretty much a mirror. It has a very narrow spray pattern, approximately one inch wide. You have to be careful spraying odd shapes with this product, as it will run if you’re not patient. Covers well with a smooth spray. 3 coats usually gets it done on most surfaces.
Rustoleum 1915: This paint is considered “in the reflective zone” also, but a bit more dull than the three previous paints as seen in the Sharpie reflection. All of our test results were photographed in direct sunlight. In the shade they darken a bit, the way most under hood parts will usually be seen. We photographed them this way to show you the metallic “flake” size of each paint. Viewed in this lighting, you’ll know if you can live with it or not. It has super fine particles and a decent spray. Covers in 3-4 coats.
Eastwood Ti-coat 34127Z: Fast drying with good coverage, fuel and solvent resistant, and a 300F heat tolerance. It's a cool looking paint formulated to look like titanium. We have not found it to match anything we generally build in our shop. But you never know what we might have to match in the future. Keep your options open!
Eastwood Silver Cad 1903Z: This paint has a blue tint! I am not sure what cadmium this will duplicate, but it does not match up to anything we have seen in our shop. It is very transparent, which means many coats to cover. As seen, very little reflection of the pen.
Eastwood Argent Silver 1291Z: A good spray and excellent flash/dry time, covers quickly. This is very close to many musclecar wheels, GM especially. A nice shade that could be used on many different parts of your ride.
Krylon Dull Aluminum 1403: This is the standby for aluminum intakes, alternators, etc. Looks good, covers great and cheap to buy. Must final mist, as it will tend to mottle a bit. As seen, only a moderate reflection.
Eastwood Clear Zinc 10280Z: This clear zinc color also has a slight bluish tint. Still not sure where this would be used for a duplication to most color surfaces of parts on the market, but having an arsenal of silvers to get your machine looking just right is mandatory. It sprays fair but needs a final mist to get good metallic separation with no mottling.
Eastwood Detail Silver 1285Z: Excellent spray covers very quick -1-2 coats. Nice shade for many parts. We use it some for interior parts.
Seymour Stainless Steel 16-054: This sunlight photo shows a bit of metallic, but in most instances parts sprayed with it will be shown in lower light, such as under hood, suspensions, driveshafts, etc. It looks like bare steel. We use this stuff a lot.
Eastwood Aluma Blast 1254Z: Sprays very nicely and flashes off quickly. This is a close match to Krylon’s 1403. You may want to get a can of each and compare to your parts. Keep in mind that brand new intakes from different manufacturers will have different shades. A restored intake that has been either glass beaded, aluminum oxide blasted, pecan or walnut shell tumbled, acid washed, etc., changes the way an aluminum shade looks - so you have to have the arsenal to get things dead on.
Eastwood Carb Renew 1329Z: This stuff comes in small cans and sprays very lightly. Aside from that, it is almost a dead on match to most carburetor bodies. We rarely use it because we rebuild and refinish all of the natural metal on our carbs, as we do not want any streaking from gas during use. For someone on a budget, consider it. It has no metallic look whatsoever.
Plasti-Kote 285: We step into the cast iron silvers used on exhaust manifolds, master cylinders, suspension parts, and anything else you may want to consider. I like this paint as it sprays very nicely, is inexpensive, and also offers great coverage. It does not tolerate high heat (maximum 500F), so using it on headers or cast iron exhaust would not be a consideration. For all other parts it’s a good pick.
Seymour Cast Iron 16-2668: You need to shake the daylights out of this stuff for it to spray well. The metallic does not show in low light like most of the parts would be seen on a car. It takes the heat very well, so exhaust manifolds are no problem. We have used it for years. Important: warm the can in the winter months in order for it to spray decently.
Eastwood Spray Gray 1258Z: Sprays nice, covers really quickly, but the heat tolerance is very low (will not take the high heat associated with exhaust manifolds). Slightly darker than the Plasti-Kote, but a nice look.
VHT Cast Grey Flame Proof: This stuff will take up to 2000F, but they recommend curing it by running your engine or baking it in oven heat! That's a lot to deal with, but that’s what it will take. It can tend to clog and sprays a bit poorly, but looks good once you get used to its spraying habits.
So, who wins the Silver Shootout? We have our favorites, but any of these aerosol paints can be deemed the winner if they just happen to provide the exact color and texture you’re looking for.
Source: Jeff Lilly Restorations
11125 F.M. 1560, San Antonio, TX 78023
(210) 695-5151
|
|