|
How to install body stripes & graphics
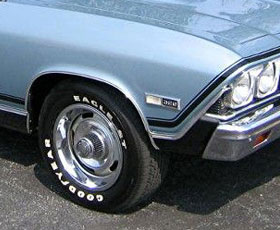
In the late ’60s and on through the ’70s, car manufacturers and the public alike were obsessed with body stripes and graphics. Seemingly, just about everything from Chevelles to Gremlins sported some type of colorful body decoration. It actually started in the musclecar arena as a way to set apart the high performance cars from the rest of the drab, mass-produced pack. And nothing screams performance like big and bold racing stripes. They could be ordered and installed in a variety of cool color combinations to match or offset the car’s paint scheme.
|
|
In fact, many of these stripe sets were painted on by the factory. In a way, it offered the buyer a chance to slightly “customize” the car to their particular liking. Along with the multitude of interior and vinyl top color options, the stripes and graphics packages allowed virtually any combination to be made, from mild to wild, in the body of your choice.
Although some of the larger stripes were originally painted on the vehicle, many kits were made of vinyl and installed as decals. They were either “laid up” by the factory, or installed by the individual dealers themselves. The kits could be purchased over the parts counter as a mere afterthought, if so desired. Often, stripe sets were later applied to entry level models - hoping to capture the bold, exciting appearance of a true muscle machine, only without the actual brawn to back it up. Even today, this is still a widely popular practice. Just check out any of OPGI’s catalogs— you’ll find factory correct body stripe kits for just about any GM A-body!
Everybody wants the machine of their dreams, right? Why settle for rebuilding a plain jane, 307 small-block Chevelle when you could just as easily make it an SS 454 with cowl induction? For many, the temptation is simply too great to resist. On the other hand, if your car is original and still wears its factory markings, chances are they need replacement. As you can imagine, vinyl isn’t exactly stunning after forty years of baking in the sun. Either way, stripes and/or body graphics are an important part of a musclecar restoration.
Let’s start with the existing body. What kind of shape is it in? Typically, the best time to apply stripes is right after the car has been painted, or at least while it’s still relatively new and fresh. Bold stripes on an old, faded paint job just look out of place. If you plan on painting the car in the nearby future, it might be a good idea to wait. Why do it twice.
|
|
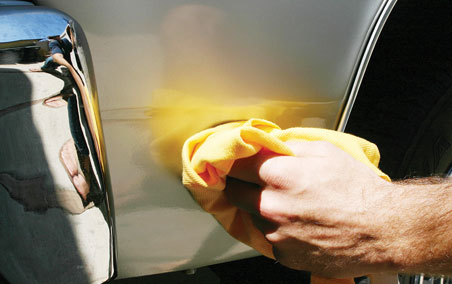
The body needs to be thoroughly cleaned of all dirt and grease before applying any tape.
Completely remove the old stripe from the surface if applicable. A fine sanding disc or solvent
should safely remove the material from the body.
|
|
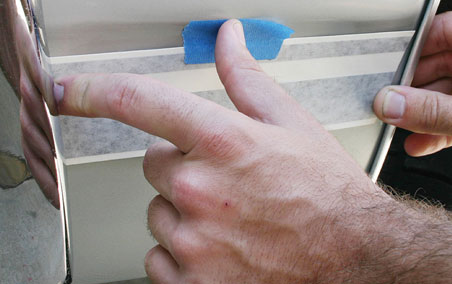
Position the stripe on the car by applying small strips of masking tape to each end of the stripe.
When laying the door and quarter panel pieces, be sure to leave a hem for the overlap into the doorjamb and around the backside of the door. Once you have located the stripe on the body,
place a piece of masking tape vertically over the center of the stripe to create a “hinge.” Remove
the tape from one end of the stripe and fold it back over the hinge. Carefully peel the backing
from the stripe and cut away the excess.
|
|
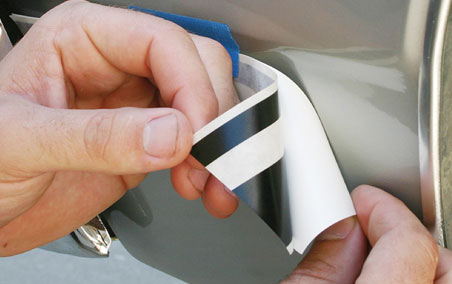
Using a squeegee, begin to apply pressure at the hinge of the stripe and slowly work your way
towards the end. Support and “feed” the stripe to avoid pre-adhesion and the forming of air bubbles. After half of the stripe has been applied, remove the hinge and finish the rest of the piece in the same fashion. The outer protective layer of the decal can now be removed from the installed stripe.
Re-squeegee the entire area of the panel to obtain maximum adhesion. The use of a heat gun may
be beneficial in applying the hem flanges. With the stripe slightly heated, the material will bond to
the surface even in the extreme bends and folds of the doorjamb.
|
There are other ways and methods to apply stripes and graphics. Some of this will depend on your car and the nature and design of the stripe package. Always follow the manufacturer’s instructions on the specifics of the job and their products.
|
|
 |
 |
|
The ’69 Buick Special goes in for a facial. Part 3.
Last 2 CCs, the project Buick entered the spa for a complete facial. We restored the dash bezel (radio bezel too!), and basically got our dash section lookin’ showroom fresh. In our
final chapter here, we’ll finish up the dash pad.
|
|

Our car’s original dash pad was a total disaster. OPGI doesn’t offer Skylark dash pads (yet!),
so we went the eBay route. Again, had this been a Chevelle, we would have been in clover.
This replacement was miles ahead of where we were, but still had a nasty dent right on the
corner of the passenger’s side. Lucky for us, the skin wasn’t broken, but we still had an ugly
mark to deal with. Here’s how we handled the problem at hand.
|
|
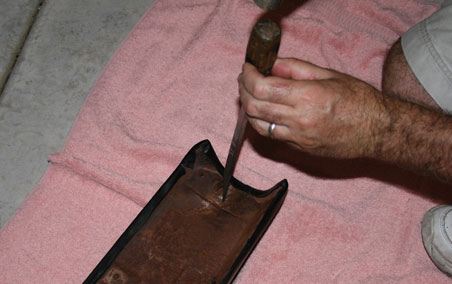
Does this look primitive? You bet it does, ’cause it is! We first tackled the dent by literally pounding
out the pad’s metal backing behind the afflicted area. Tools were simple: a large screwdriver and a hammer. This helped, a lot.
|
|
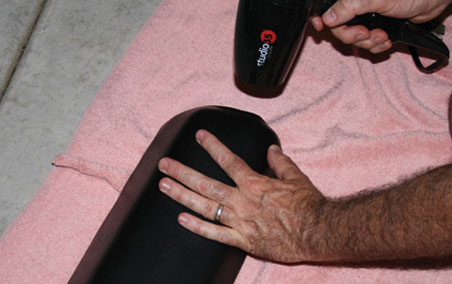
Next step was the hair dryer. This worked really nicely at softening up the hard vinyl skin, and the dented foam underneath it. If you use a heat gun, go easy! Vinyl melts real fast.
|
|
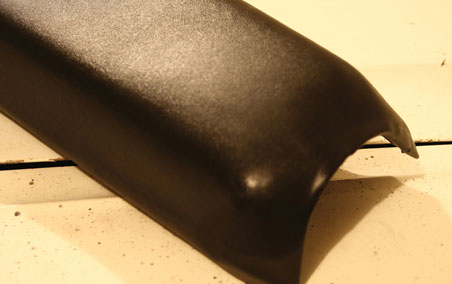
We literally squeezed out the dent using our thumbs. It took a lot of effort, and almost constant
re-heating of the area with the hair dryer. Gradually though, you can see the dent work out.
Sore thumbs? Yes, very much so.
|

After a thorough cleaning with some mild dish detergent, the entire pad was treated to
3 coats of Meguiar’s Gold Class Vinyl/Rubber Protectant.
|
The entire pad has been brought back to life, ready to re-install in our Buick. Should be good for another 40 years!
UPDATE: As of this writing, our ’69 Special is slowly getting put back together. We’re still in the paint work’s cut/buff phase, but our baby’s starting to look like a show car. Goal is to have her complete later this summer. Our parts boxes are full of new OPGI parts, ready to bolt up. We’ll cover it all here in Colin’s Corner!
|
|
 |
|
|
Cadillac’s High Calling
by Tom Shaw
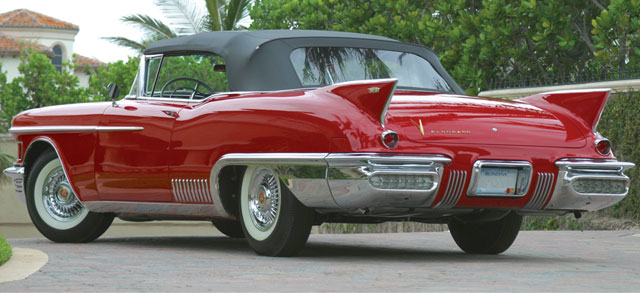
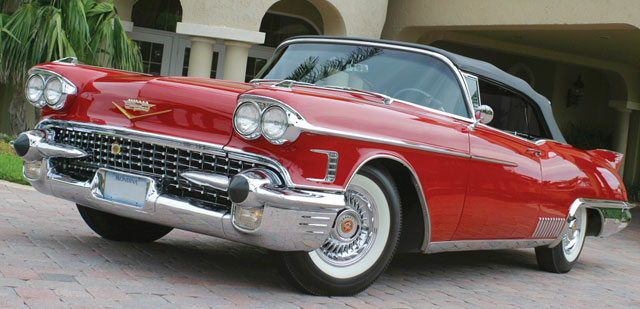
When was the last time your saw a 1958 Cad? This one’s a jaw-dropper to say the least. Here’s a feature that may give you little insight into Cadillac’s history back then.
If you grew up in the 1950s or ’60s, you remember the impact that the name “Cadillac” had. Cadillac was one of those “gee whiz” cars that never failed to get noticed. In our middle class neighborhood, the passing of a Cadillac was an event calling for a moment of silence to pause, look, and let your mind wonder about the exotic luxuries pampering the people inside.
The name “Cadillac” was a powerful statement. Everybody knew that they had every conceivable feature known to man – electric seats, power windows, power vent windows, air suspension, multi-carbs, automatic headlight dimmers, electric door locks, air conditioning, and who knew what else. It was no garden variety Ford or Chevy. Cadillac was carefully groomed to be GM’s top tier division. Before the German auto industry came of age, and with the Japanese auto industry still in its infancy, American cars ruled the road, and none was more prestigious than Cadillac.
GM’s premier luxury division was not, however, geared towards volume. Since the end of World War II through 1955, Cadillac garnered less than a 2% market share. That may sound miniscule, but consider competitors Imperial, which averaged less than .5% per year, and Lincoln averaging between .5 and 1% per year.
GM’s premier luxury division was not, however, geared towards volume. Since the end of World War II through 1955, Cadillac garnered less than a 2% market share. That may sound miniscule, but consider competitors Imperial (which averaged less than .5% per year), and Lincoln (averaging between .5 and 1% per year).
Cadillac was operating at capacity, and to achieve meaningful growth, more plant capacity would be needed. GM added 660,000 square feet to its Clark Avenue plant in 1954, and acquired two other plants that year.
For 1955, the American auto industry had a banner year as manufacturers’ breakthrough styling and new, more powerful engines pushed sales to record levels. Cadillac had its best sales year ever, enjoying a surge in both market share and unit sales as 153,000 new Caddys hit the streets.
The following year overall sales cooled, and Cadillac’s total sales ebbed a bit, though its market penetration was now up to 2.4%. People were responding to what they were seeing in Cadillac showrooms. That set up another great year for Cadillac —1957.
During ’57, Cadillac sales were humming along 2.5 times its best pre-war year. Also during 1957, Cadillac completed the acquisition and refurbishing of a former Hudson plant on Detroit’s east side, adding 1,000,000 more square feet of plant capacity, which was put to work stamping panels. By the end of the model year, Cadillac’s series 62 had become the runaway leader of the “fine car” field, earning more than three times the revenue and market share of the number two car (Lincoln Premier). Tallying the end-of-model year figures, Cadillac had come within 98 cars of equaling its ’55 production record. The 153,236 units run for that model year was even more impressive since it came in a year when industry sales were only 6.2 million, down from ’55’s 7.1 million.
|
 |
|
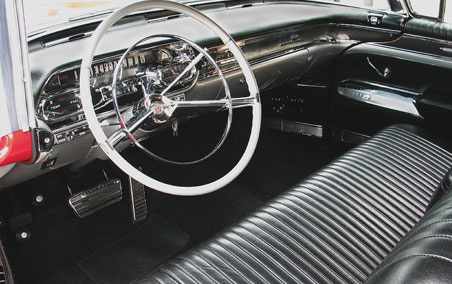
Moving forward, Cadillac’s ’58 models continued the strong styling cycle, looking ready, willing, and able to continue the charge for sales and market share. As did other GM divisions, Cadillac had a redesigned car for ’58, which carried forward Cadillac’s well-established styling themes; a body with plenty of dimension, dramatic fins, elaborate chrome grille, and generous chrome decoration. The continuity was a good thing considering Cadillac’s recent success. Up front, the ’58s, like the rest of the industry, went to quad headlights. The diagonal bumper treatment was dropped and the grille was simplified. Fins were updated too. While the ’57s leaned forward at their trailing edge, the ’58s were tilted rearward, just like the tail of the new Boeing 707 jetliner. Bumpers were very similar, and the twin taillights now shared a common brow.
Voice-over on a television commercial presented the ’58 Cad like this:
“The Cadillac motorcar for 1958 is a rare masterpiece in all the things that make a Cadillac a Cadillac. There’s its clean, graceful symmetry of line, and the protection provided by its many safety features. Every window of every Cadillac is safety plate glass. And of course there’s its remarkable look of stature and substance. Never before have Fleetwood coach-crafted comfort and spaciousness been blended into such interior elegance. And most assuredly, it has set its own extraordinary pace in modern motorcar performance. And optional on every model is the wonder of air suspension. In the way it looks, rides, and drives, this is Cadillac’s finest. We hope that you will take the time to see and drive this magnificent new Cadillac very soon.”
|
 |
|
The big sellers were the series 60 and 62 models. At the top was the pricey and prestigious Eldorado, offered in either hardtop (Seville) or convertible (Biarritz). Eldorado, Spanish for “the Golden One”, came loaded with just about every feature known to man. There were actually just a few options to choose from, including: Air Conditioner, Air Suspension, Electric Door Locks, Automatic Headlight Dimmer, Gold-Finish Grille, Tinted Glass, Front Seatback Lock, (right side).
|
 |
|
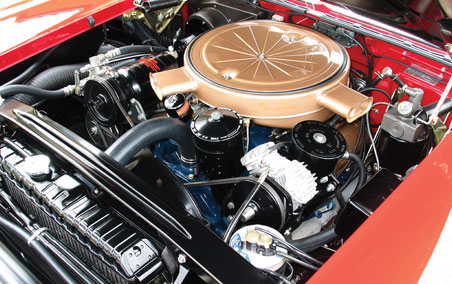
Cadillac used a 365 cid V8 throughout the model line, except for the Eldorados, which got the step-up 3 x 2 version, rated at 335 hp. Its engineering was conventional – a cast iron 90° V8 with modest valves, ports, and cam.
These were golden years for Cadillac. The division knew who it was and how to please its customer. The Cadillac name had earned a powerful presence, and the sales trend was upward. Soon enough the division would face energy shortages, downsizing, intense competition from Germany and Japan, and the aging of its customer base. But for the 1950s, Cadillac was on top of the world.
|
|
 |
|
Adding some rumble to the Project Special, Part 2

The Super 40 Series mufflers are mocked up into position.
Last CC, we showed you the initial phases of our project ’69 Buick dual exhaust installation. In “chapter 2” here, we’ll finish the job.
We’re using Flowmaster’s part# 17119 — a full 2-1/2” tube system built specifically for 1964-’72 GM A-Body —with Super 40 Series Mufflers, for that cool muscle car rumble.You can get a hold of this complete system at Original Parts Group (of course!)
|
| Russ Rosenthal from North Valley Muffler & Brake in Grants Pass, Oregon, is doing the install. |
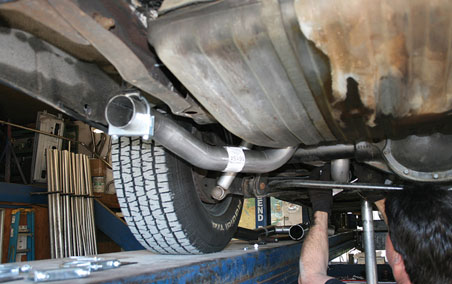
With one of the rear pipe sections attached, Russ fine tunes the muffler’s position.
|
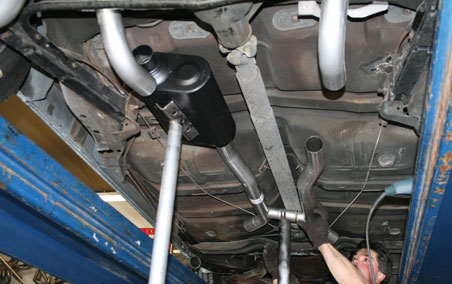
Here the H-pipe section is mocked up. Whether you are doing the install yourself or having a
pro handle the job (our recommendation), it’s important to loosely fit all the sections before you attempt clamping or welding the system together. Flowmaster’s system fits to a tee.
|
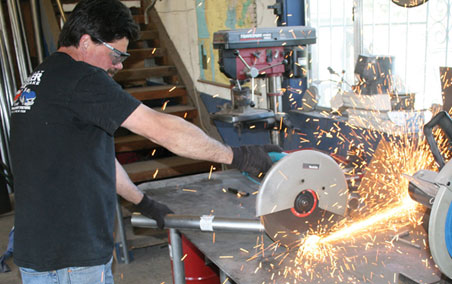
As we mentioned in last month’s CC, this system is better suited to use with exhaust headers, not really the shorty manifolds our stocker came with. The Flowmaster set up does not come with any piping ahead of the H-pipe section, so Russ had to fabricate tubes that connected the H section to our factory exhaust manifolds. No big deal, just some simple measuring and cutting.
|
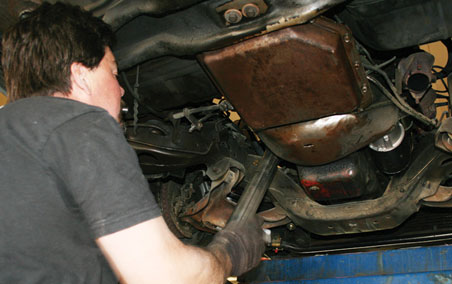
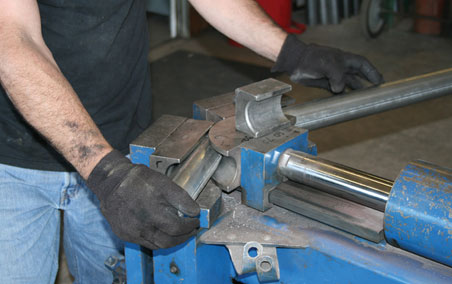
The fabricated tubing is test fit for length, and then properly angled using a hydraulic tubing bender. Any professional muffler shop has one of these benders - so if you’re contemplating installing a new exhaust system by yourself - when you get to this point, have the tubing bent by a pro. Smooth, uninterrupted exhaust flow is critical to overall performance.
|
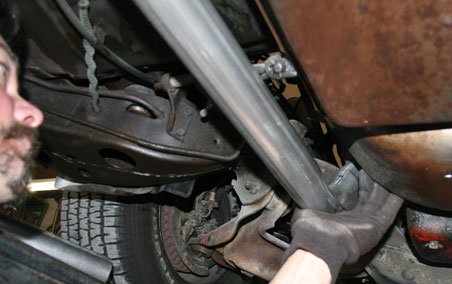
The “homemade” tubing gets its final fitting.
|
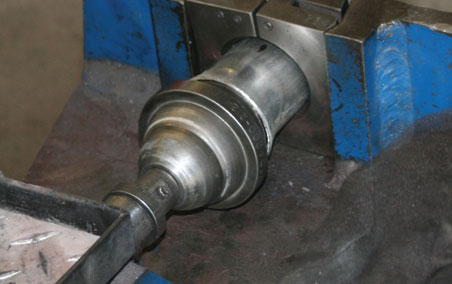
The ends of the tubing are flared for joining at the manifolds.
|
|
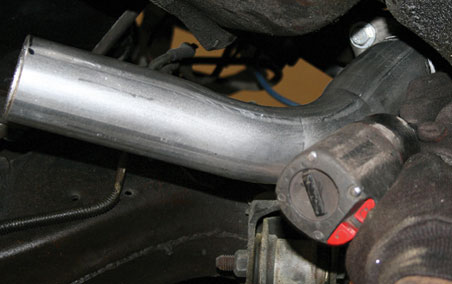
The fabricated tubing is then fastened to the manifolds.
|
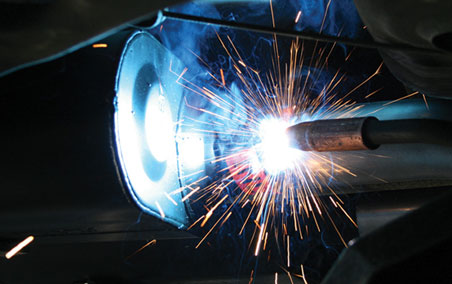
With the entire system in place, Russ starts welding the joins.
|
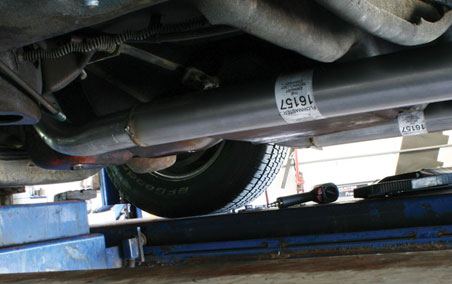
Now it’s starting to look like a real exhaust system!
|

A set of hangers gets welded just behind the mufflers.
|
|
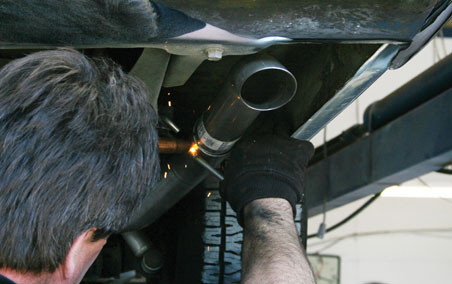
Flowmaster supplies two variations of tail pipes; a set that juts straight out with a beveled cut, or
a more stock appearing set that features a down turned cut-off. We opted for the stocker approach, and they were welded into position.
|
|
We mentioned earlier in this story about the sound generated by the Super 40 Series mufflers. We think they’re just the ticket for our ride.
|
Source:
North Valley Muffler & Brake
3388 Merlin Road, Unit C
Grants Pass, OR 97526
(541) 476-6631
|
|
|