|
Installing new front lowering springs and shocks
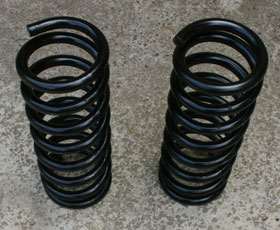
What’s the big deal with lowering springs? The whole idea here is to slightly lower the car, giving it a better center of gravity. The springs used in this feature will lower your vehicle by approximately 2”. When you’re done, you’re going to have one mean lookin’ road machine with greatly improved road manners.
Tools required: socket wrenches, rubber hammer, pry bar, pickle fork (ball joint removal tool), drill with bit for drilling steel, grease gun, grease.
|
|
Tip: Always support lower control arm when removing coil springs. If you have access to a hoist (or lift), take advantage. An impact wrench can save you time...
Ever notice how the topic of road handling never seems to crop up when people start talking about their musclecars? Most older street machines do real well as long as they’re going in a straight line. Get into the twisties however, and a lot of these cars simply give up; some of them even become downright dangerous. Very few cars from the late sixties and early seventies exhibited any kind of ability to tackle corners without excessive body roll, mostly due to the lack of attention paid to the car’s underpinnings. After all, the name of the game was quarter mile domination. Well, here, I’m going to cover the basics of installing a new set of lowering springs and shocks. By the way, OPGI carries both of these items, in spades.
It’s important that you start with good solid suspension parts to begin with. Make sure the upper and lower ball joints are in decent shape, as well as your tie rod ends. Ours were in pretty rough condition, so we decided to replace both (again, with OPGI parts). You can work with your vehicle raised on a hoist, or with a quality set of jack stands. Take the necessary precautions while working under any vehicle.
Since you’re going to be removing the original coil springs, you’re going to need to support the lower control arm. This can be done with a heavy block of wood and whatever further support is available (jackscrew, etc). Remember, the spring is under great pressure, and once the spindle assembly is removed, it can be literally launched into the air. Use extreme caution here! To avoid damaging the brake flexible lines, we disconnected them at this stage.
|
|
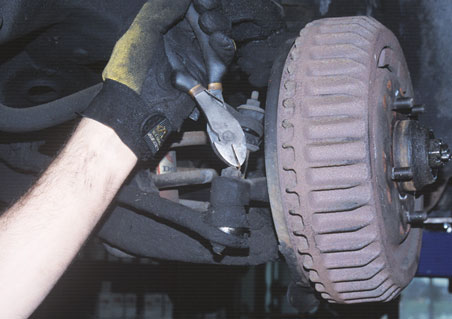
Unless your upper and lower control arms are severely bent or damaged, you will be
using your existing parts. As shown here, we’re removing the front end cotter pins.
|
|
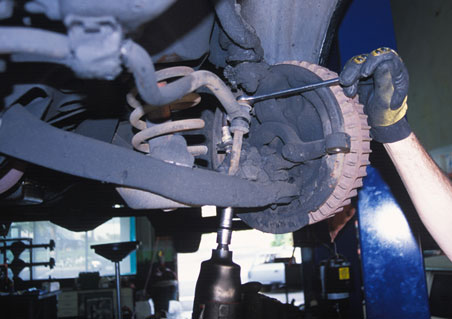
Next, we removed the sway bar and end links using standard socket wrenches.
An impact wrench saves time and effort.
|
|
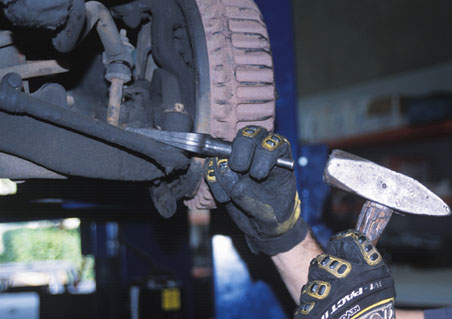
The old rubber bushings on the tie-rod ends can be cut, drilled or punched out.
Then, we removed the old shock absorbers.
|
With the lower control arms (and that coil spring) fully supported, we removed the castle nuts that secure the ball joints, then pulled the spindle/brake assembly. At this point, it’s a good idea to check the upper and lower ball joints. Take the threaded pin that fits through the spindle and try to move it with your fingers. If it’s loose and moves from side to side, it’s time to replace them. The originals are riveted into place, so you’ll have to drill them out and install new ones. New ball joints are affixed with nuts, and cannot be riveted back in as the originals were.
We then gently release pressure on that support under the lower control arm. Go slow, the object here is to GRADUALLY release the spring. Stand clear of the spring in case it “pops” from the “pockets” in the control arms. You may need to use a large screwdriver or pry bar to coax the spring finally out. As stated before: USE EXTREME CAUTION!
|
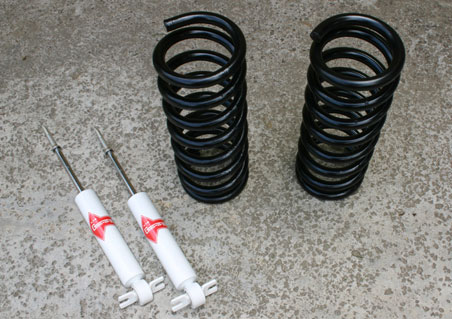
Next step is to insert the new spring. We used 2” lowering springs (part #C990098 from Original Parts Group). These are specially developed variable rate springs, which actually do a couple of things. The original springs on your car are variable rate, as opposed to today’s much stiffer progressive rate. These new springs are designed to offer a much more comfortable ride, at the same time providing excellent road feel and control.
IMPORTANT: Make sure the end of the spring sets into the lower most portion of the spring pocket. The holes in the pocket are for water drainage. If you’re having difficulty getting the springs to set properly into the upper and lower control arm spring pockets, hold the lower arm up in place with one hand, then rotate the spring until you feel it move into position. Tighten your support under the lower control arm until you can fit the spindle/brake assembly over top of the ball joints. Install castle nuts and secure with new cotter pins.
On the lower control arm, you’ll need to replace the lower shock mount retainers. The old ones will be damaged after you remove your original shocks. The KYB gas shocks are inexpensive and help provide excellent control. Push them up through the bottom of the lower control arm. Fasten at the top of the shock mount...then attach the lower portion of the shock to the lower control arm. Follow the manufacturer’s enclosed instructions.
Remember to re-lubricate the upper and lower ball joints using a grease gun.
Next, we attached new tie rod ends and bushings. Before securing them to the steering knuckle, coat with grease. Don’t forget to reattach brake lines.
Final step is to reattach the end links and sway bar. A typical upgrade would be to move from a 7/8” up to a 1-1/8” bar. Brake fluid should be checked and brakes bled.
IMPORTANT: I highly recommend following through with rear suspension modifications, including installation of the rear sway bar. A car with a beefed up front end and a factory stock rear can experience severe control problems during moderate to hard cornering. The rear of the car is very likely to loose road adhesion and may come around 180 degrees under certain driving conditions!
|
|
 |
|
High Aspirations
Story by Richard Rozum
Kent Vanderlinde’s passion for Cadillacs all began back in the mid-fifties. Growing up in an upscale neighborhood in Ohio, Cadillacs were a common sight parked along the boulevards and in driveways. While Kent’s parents didn’t drive Caddys, his grandfather did - along with many of his parent’s successful friends. Kent was a car guy and it just seemed like everyone aspired to drive a Cadillac; it was the American symbol of success.
|
|
When he was young, his good friend Dan’s father drove two Cadillacs, a Fleetwood and an Eldorado Convertible, and these cars left impressions on Kent that would last the rest of his life. During Kent’s school years, he drove a Cadillac while most kids desired something a little more sporting.
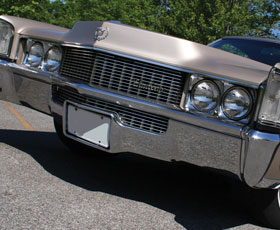
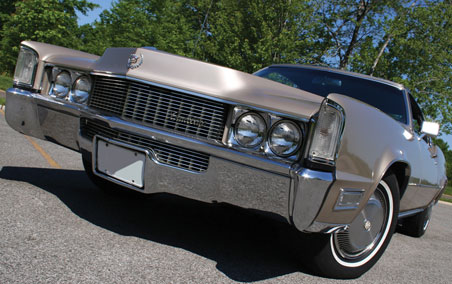
It was back in the year 2000 when Kent spotted a handsome ’69 Eldorado sitting out on someone’s front lawn with a “For Sale” sign in the window. He stopped to check out the car and liked it very much, but felt the price was unreasonable, so he let it go. Soon the car disappeared, and he thought it was gone forever. Well, fate sometimes works in strange ways! While attending a cruise night a few months later, Kent came across the very same car. Upon talking with the driver, he learned that the car was now owned by a new car dealer who had taken it in on trade, and they had brought it to the cruise night trying to sell it. Kent ended up buying the Eldo from the dealership for a much more reasonable price. Some things are just meant to be.
Today Kent has a collection of no less than eight classic Cadillacs - still the ’69 Eldorado featured here is one of his all-time favorites. It could be the styling - he is especially fond of the taillights, or it could be the fact that it’s such a solid, original, low mileage car - or the fact that it gets compliments everywhere it goes. What really does it is that it’s not only a very well made car; it’s a sheer pleasure to drive. This Eldorado is truly what a Cadillac is meant to be, no less than “The Standard of the World”.
|
|
|
The 1969 Fleetwood Eldorado marched on in its third year as a front wheel drive sub-series of the Fleetwood line with few changes. The major styling change for 1969 was the new cross-hatch grille and dual exposed headlamps. The Eldorado was available in one single model: a six-passenger, two-door hardtop on a shorter-wheelbase platform. With a wheelbase of 120 inches and a shipping weight of 4,550 lbs, the Fleetwood Eldorado was the smallest Cad in the fleet, yet is every inch a luxury car in the Cadillac tradition. The uniquely elegant personal styling of the Eldorado is further enhanced by the fact that it’s the only car in the world to offer as standard equipment the precision of front wheel drive, the maneuverability of variable-ratio power steering, the balance of Automatic Level Control and the fidelity of front disc brakes. Now top this off with the Cadillac 472; the largest production V8 to ever power a passenger car - and the Eldorado becomes the standard by which all other personal luxury cars will be judged.
The 1969 Cadillacs were introduced on September 26th, 1968, and were very well received, setting a fifth consecutive sales record. Sales were brisk, especially for a car of Cadillac’s status, with calendar year sales surpassing 250,000 units for the first time in Cadillac’s illustrious history. The Eldorado contributed with a 1969 model year production of 23,333. Very respectable numbers indeed for a car with a base price of $6,711, over double the price of an average car in 1969.
|

|
|
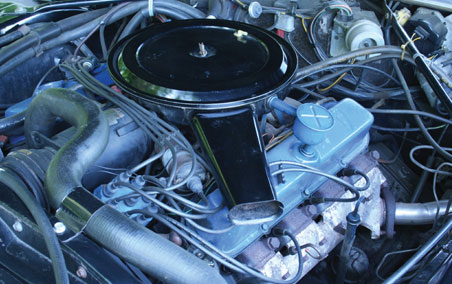
The Cadillac 472 V8 holds the enviable title as the largest production engine in any passenger car in 1969. Horsepower of 375@4,400 rpm and torque of 525 ft.lbs.@3,000 rpm is enough to make the Eldorado a real performer. Bore and Stroke is a huge 4.30” x 4.06”. Now that’s a big piston! Compression ratio is 10.5:1. Fuel is fed through a Rochester 4MV Quadrajet four-barrel Carb.
The 472 is basically the same engine used in all 1969 Cadillacs although standard dual-exhausts are unique to the Eldorado.
|
|
|
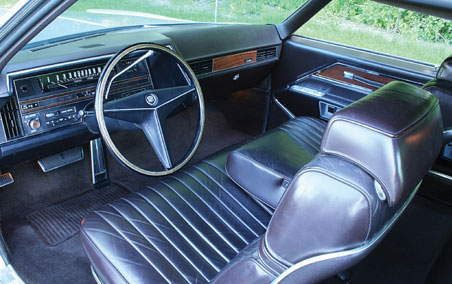
What at first may appear to be a Black interior is actually Cordovan, a very dark maroon. Optional leather upholstery adds a lustrous, rich appearance. Fold up the center armrest and there is room for three across seating in comfort. Six passenger seating is much more comfortable thanks the front wheel drive Eldorado’s flat floor.
Gauges are limited to Speed, Fuel Level and Clock with warning lights provided for all other functions -providing little to distract owners from the soft and whisper-quiet ride.
|
|
|
Interesting facts:
• Production of the Eldorado body was transferred from the Fleetwood plant in Detroit to the Fisher Body Plant in Ohio for 1969.
• The anti-theft steering column/transmission lock along with an energy absorbing steering column became standard for 1969.
• The Cadillac 472 V8 was extensively laboratory-tested an equivalent of over 500,000 miles and would prove to be an exceptionally durable engine.
|
|
 |
|
Adding some rumble to the Project Special, Part 1
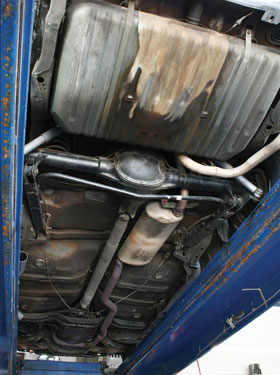
I’m pretty sure I’ve mentioned that my ’69 Buick Special project car is equipped with a 350 cube Buick mill, albeit a lowly 2-barrel version with a single exhaust. I have plans to upgrade the car to a 4-barrel set-up down the road though. But since I’m not quite ready for that switcheroo yet, at least I can add more oomph and some classic musclecar sound by installing a hot dual exhaust system.
In this installment, we’re going to hook up our Special with Flowmaster part# 17119 — a full 2-1/2” tube system built specifically for 1964-’72 GM A-Body.
Flowmaster’s system comes with their Super 40 Series Mufflers too, which creates pure magic to the ears. Maybe not to your neighbor’s ears, but definitely to ours. Actually, the Super 40 Series is not too loud, and the tone is perfect. Let’s start a-cuttin’. We took the Buick and our new exhaust system to North Valley Muffler & Brake in Grants Pass, Oregon, and had owner Russ Rosenthal handle the installation.
|
|
|
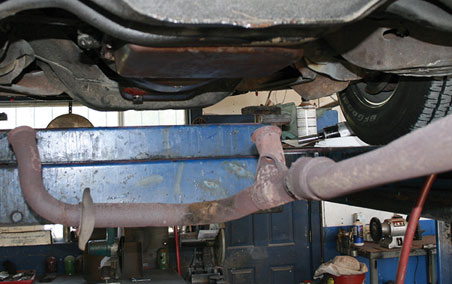
Our existing single system has done its tour of duty. Yep, this was the original exhaust,
and after 41 years, is finished.
|
|
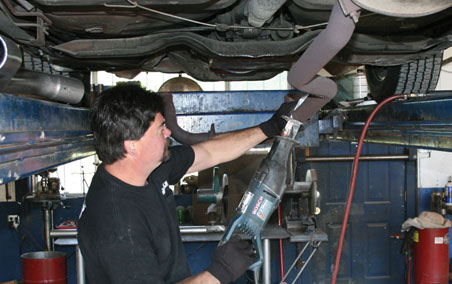
Russ Rosenthal commences with the Sawzall. We’re breathing better already.
|
|
|
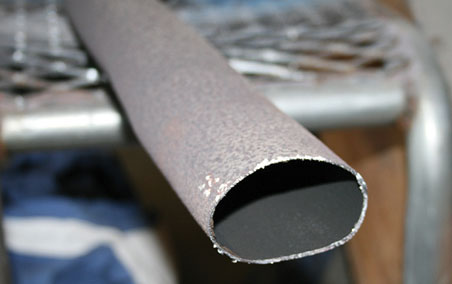
Ahh, yes, the ol’ distorted pipe syndrome. Heat and time can ravage an exhaust system over time, really cutting down that precious airflow.
|
|
|
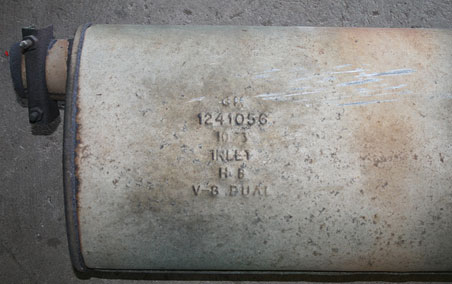
Our system was definitely the original- check out that stamping on the muffler. Interesting to note it says “V-8 DUAL”, even though the car came equipped with the single muffler.
|
|
|
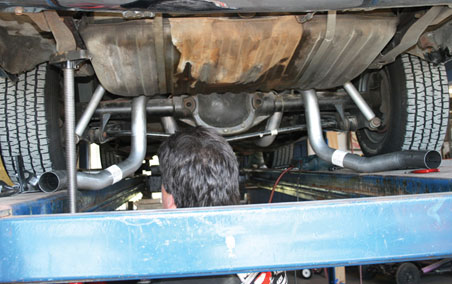
The new dual exhaust system is laid out and visually inspected. Flowmaster has designed this system to fit perfectly throughout the A-Body’s undercarriage. Pay no attention to that super grubby fuel tank! That too, is all original, and will be replaced. Watch for that soon in a CC coming soon.
|
|
|
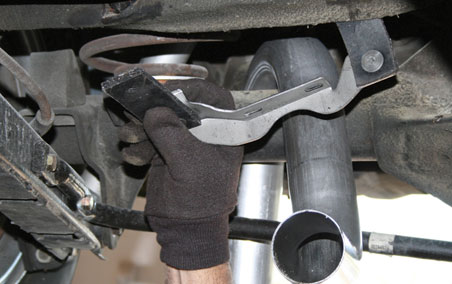
Of course, all the necessary mounting hardware is included with the kit.
Here Russ quickly bolts up some hangers just in front of the axle.
|
|
|
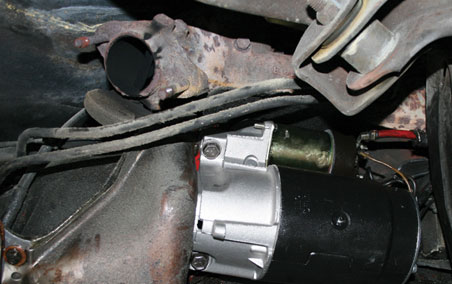
Here’s a shot of one of our now open exhaust manifolds. Yep, you guessed it, factory original. It was at this stage that we realized that the Flowmaster system was really designed for cars equipped with headers. We’ll have to fake it a bit, more on that next CC…
This shot also shows our new starter motor. The old (original, yes) unit packed it in a few months ago. A replacement unit was supplied by OPGI and installed.
Next issue of CC, we’ll follow up with the conclusion of our dual exhaust install. Stay tuned!
Source: North Valley Muffler & Brake
3388 Merlin Road, Unit C
Grants Pass, OR 97526
(541) 476-6631
|
|
 |
|
The ’69 Buick Special goes in for a facial. Part 2.
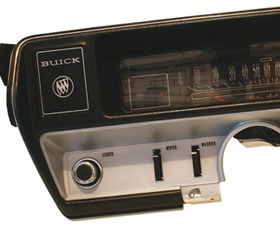
In the last installment of CC, the project Buick entered the spa for a complete facial. We tackled the initial steps of the dash bezel restoration—namely removal of the instrumentation, vent controls, etc. and started the painting process.
We had just finished coating our bezel in Rustoleum’s 7515 Aluminum rattle can paint. It did a remarkable job of duplicating GM’s original factory finish. Here, we’ll catch up with the rest of the makeover…
|

|
|
It took 4 light coats of paint to give a nice, even coverage of silver to our bezel. Don’t let the name
of the paint (Aluminum) fool you - it dries to a factory-correct looking hue. We let it dry for
4 hours, then carefully removed the masking tape.
|
|
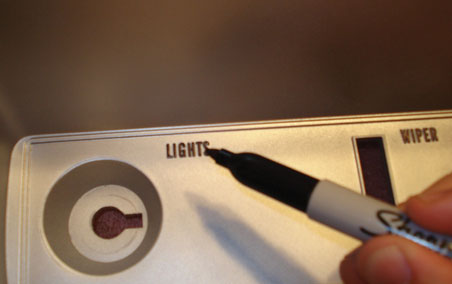
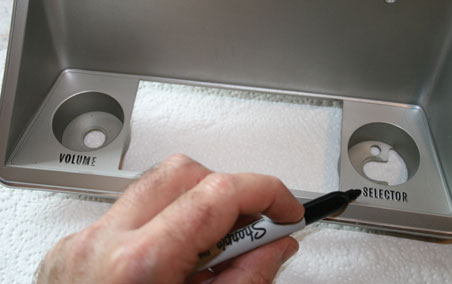
We couldn’t wait to get into the detailing part! The raised lettering “LIGHTS”, “WIPER”, “WASHER”
and “LIGHTER” were treated to a makeover using a black fine point Sharpie permanent marker.
Go easy, take your time. It applies very well.
|
|
|
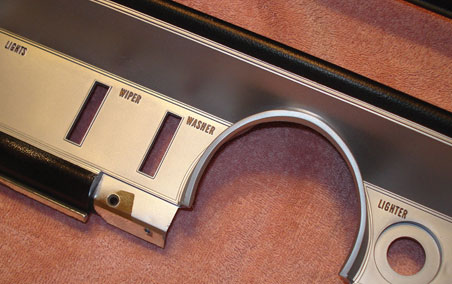
This photo is before we’ve masked everything for black. Just couldn’t resist showing you how nice
the freshly detailed raised black lettering looks against the new silver background. Of course,
we’ve covered some of the very fine chrome finish on the bezel, but hey, if you want to spend
hundreds on having the part re-plated, go ahead. We are on a budget, and our car is a
real nice daily driver, not a show queen.
|
|
|
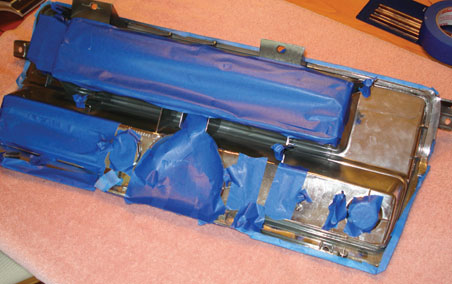
After waiting another 24 hours, we mask off the freshly painted silver areas in preparation
for black paint. Don’t burnish too hard here (on fresh paint).
|
|
|
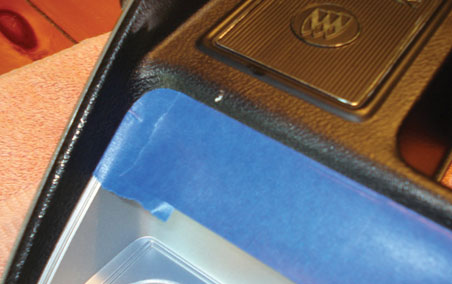
Here we’ve masked off everything we don’t want a coat of black paint on. Again, use the
high quality Scotch Blue tape - it doesn’t peel or curl. It’s very important to get a good mask,
since black overspray on our nice silver would not be good.
|

|
|
We went around the outer edge of the masking tape with a pen tip (lightly)
just to make sure we had a nice, tight mask.
|
|
|
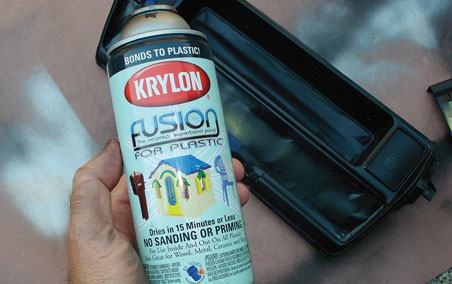
The black we chose was Krylon’s “Fusion for Plastic”, in Satin Black. It really does adhere well,
and only took 2 coats to bring our bezel back to factory fresh looking. Obviously,
spray in a well-ventilated area (not on the dining room table).
|
|
|
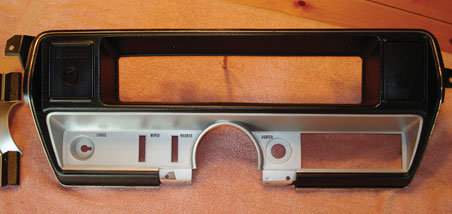
Here we go - now things are really starting to shape up nicely. Before paint, we masked the
factory-chromed edge (around the outer edge of the bezel) since the chrome was still in nice shape.
|
|
|
The bezel surrounding our original AM Sonomatic radio was treated to the makeover as well. Same aluminum paint (leaving the chromed edge alone), and Sharpie marker treatment. Sweet!
|

|
|
We used a Sharpie Metallic Silver marker to highlight the raised lettering and Buick emblem
areas on the upper part of the bezel. Nerve wracking, yes, but the key is to go easy...
|
|
We were fortunate, our instrument cluster lens was in pretty decent shape. A little polish and it came up nice. The new heater control/panel was snagged off a fellow hobbyist. Our new OPGI heater cables will attach to the back of the control unit.
Next month: We’ll finish our project with a dash pad resto. See you then!
|
|
|