|
Sweet Chevelle
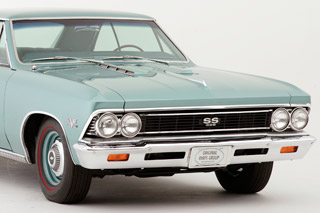
A showroom stock, ready to rock ’66 Chevelle
gets put back better-than-new!
1966 was a year of big changes in automotive styling, and Chevrolet’s
iconic Chevelle brand was certainly no exception. FoMoCo had
axed the boxy Fairlane look for good, finally putting that car
on a sleek new platform. Even the Mopar camp had taken their
somewhat bizarre Coronet and Belvedere line to new eye-catching
levels by doing some serious streamlining.
Yes,
if you were around in ’66, you were eyewitness to a
dramatically altered automotive landscape - and I mean that
in a good way! Even if you’re a diehard fan of the boxier “first”
Chevelles (1964-’65), there’s no denying the all-new
’66 was a complete stunner. Aerodynamic “Coke
bottle” styling, fresh new grille and taillights, and
a very distinctive C-pillar with a wind-swept design on the
SS models created a package that buyers couldn’t resist.
Four series of Chevrolet’s mid-size were available:
Super Sport 396, Malibu, Chevelle 300 Deluxe, and Chevelle
300. Twelve models were spawned out of this series too - convertibles,
sport coupes, wagons, and 2 and 4-door sedans. How does that
compare to today’s Malibu line-up? Well, never mind...
Want a little more variety? How about a choice (depending
on the model you select) of 3 different “standard”
engines? The 120 horse Hi-Thrift 194 cubic-inch Six, the 195
hp Turbo-Fire 283 V8, or the 325 horse Turbo-Jet 396. Then
of course, there was the “optional” engine line-up.
Extra cost engines included the 140 horsepower Turbo-Thrift
230 cube Six, the 220 horse Turbo-Fire 283 (V8), the 275 hp
Turbo-Fire 327, or the top-of-the-heap 360 horse Turbo-Jet
396. Today’s Malibu has, well, two engine choices. That’s
not to demean Chevy’s current mid-size in any way; it’s
just to illustrate how things were more than a tad different
44 years ago.
In addition to all those engine choices for 1966, you could
select from 4 different transmissions as well. The standard
tranny was a fully-synchronized 3-Speed manual unit. Extra
cost optional trannies included a full-sync 4-Speed (floor
mounted), an Overdrive automatic, or the legendary Powerglide
-a three-element torque converter with hydraulically controlled
2-speed planetary gearing (P-R-N-D-L).
The top-of-the-line Chevelle for ’66 was, of course,
the legendary Super Sport 396. You could order this beast
in Coupe or Convertible form. Standard firepower with this
model was the 325 horse Turbo-Jet 396 cube V8, with the manly
360 hp 396 being optional. With either engine, the 3-Speed
tranny/floor mount shifter was base equipment. The 4-Speed
(floor mount shifter) and Powerglide were both optional.
On the outside, all Super Sports got distinctive non-functional
louvered hood “scoops”, polished stainless steel
moldings on the wheel openings, sill area (rockers and rear
quarters), as well as unique SS 396 badging.
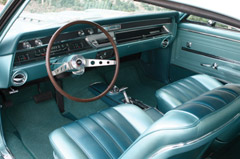
Ah, the glory years of interiors! Yes, when it came to color
choices inside the SS396, you could go hog wild. Eight color
choices were on the list for ’66: Red, Blue, Black,
Bronze, White, Bright Blue, Fawn, and Turquoise. Front and
rear seatbelts were standard. Interiors were all-vinyl. Originally,
our CC feature car sported a White interior, but was changed
to Two-Tone Turquoise by the OPGI crew.
Strato-bucket seats are the perfect complement to a fully-loaded
interior featuring floor console, Sports Styled Steering Wheel
with Simulated Walnut, Power Windows and Air Conditioning.

The big bad 360 horse 396 - the top offering for Chevelle for 1966. This particular motor is the original unit, and it’s
been meticulously restored by OPG’s Sales Manager James
Ferguson.
The 360 hp Turbo-Jet 396 features a 4-barrel carburetor, chrome-plated rocker covers, air cleaner, and oil filler cap.
Cast
aluminum pistons • 10.25:1 compression ratio •
4.094 x 3.76 (bore and stroke) • 360 hp @ 5,200 rpm
• torque: 420 ft.lbs. @ 3,600 rpm
|
138176Z144932
1 – Chevrolet Motor Division
3817 – Chevelle Model
6 – 1966 Model Year
Z – Freemont, California Assembly Plant
144932 – Basic Production Number
Exterior Colors: Chevrolet - Chevelle - Chevy II - Corvair
A Tuxedo Black
C Ermine White
D Mist Blue
E Danube Blue
F Marina Blue
H Willow Green
K Artesian Turquoise
L Tropic Turquoise
M Aztec Bronze
N Madeira Maroon
R Regal Red
T Sandalwood Tan
V Cameo Beige
W Chateau Slate
Y Lemonwood Yellow
|
 |
|
Inspection of differential housing and gear set
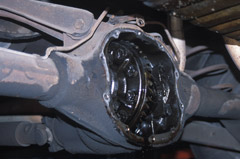
In this short tech, we’re going to cover how to inspect
your car’s differential housing and gears, not a total
rebuild. You won’t need a lot of tools for this job, just a standard socket set, flat-blade
screwdriver, and a hammer or mallet. Your “tinware”
will include new gear oil, clean rags, a container to collect
the old oil, and a new differential cover gasket.
Let’s face it; it’s easy to neglect routine maintenance needs of your car’s rear axle assembly.
Unless there is some horrific sounding grinding coming from
back there, the differential fluid level is probably good and
clean. An easy-to-believe scenario, but not entirely accurate.
True, the rear end components are pretty tough, but even they
need to be cared for. When you think about the extreme loads
that are being placed on the differential and rear axles, it’s
pretty easy to realize that in time, breakdown is inevitable.
Preventative and periodic maintenance can go a long way!
A totally ignored rear end assembly can cost you more than money,
it can cost power too. Posi-traction units will loose much of
their effectiveness, and open ended diffs can become utterly
useless. All the engine power in the world does you absolutely
no good if the rear end is unable to deliver that power to the
drive wheels. And in order to do so, everything must be in perfect
working order. If you suspect problems, or maybe you can’t
remember the last time the gear oil has been changed, it’s
definitely time for a routine inspection and clean-up.
First off, the rear differential cover must be removed. Using
a shop hoist is best, or, if you don’t have access to
one, use a floor jack and jack stands. The object here is to
safely raise and secure the rear of the vehicle—allowing
access to the cover bolts. You’ll need to have some type
of container in position to catch the gear oil from the bottom
of the housing once it’s removed. Then, remove the retaining
bolts from the diff cover, starting with the bolts near the
top of the diff cover. After the bolts are removed, it may still
be necessary to pry the cover along the edges away from the
housing. The thick, rear-end gasket can create a pretty tight
bond between the two surfaces. Go easy, being careful not to
bend the sealing area of the cover plate.
Once the cover has been removed and the fluid drained, you’re
going to inspect the inside of the housing for any built-up
sludge. Use a shop light or a strong flash light to really see
what’s going on in there, and remove the sludge (usually
found at the bottom of the housing) with some clean rags. Commercial
cleaners in the form of spray cans also work well for dissolving
old residue and oils.
Now, this is where you’re going to have to have a sharp
eye. Closely examine the teeth of the gears for chipped edges
or cracking. One side of the ring gear may show excessive wear.
This usually indicates sloppy gear engagement and operation.
If the teeth appear to be damaged, you should replace the gear
set. If you can tackle this yourself, great. If not, go see
a quality shop and have the work done. If you decide to do the
job on your own, Original Parts Group has everything you’ll
need to get the job done properly. From new ring and pinion
sets to complete differential units and rebuild kits, OPGI has
it all for your GM-A Body. If you need advice, give one of the
OPGI sales technicians a call, they’ll be able to answer
any questions you may have.
If however, after a thorough inspection and cleaning, your gears
appear OK, install a new diff cover gasket and your cover plate.
Torque the bolts down evenly to the manufacturer’s specs.
Refill the case with quality gear oil and check for leaks.
|
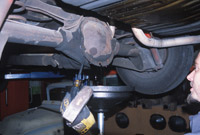
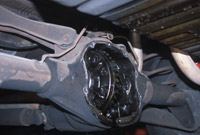
1: In this photo, Steve from Diff Works in Corona, California, uses a flat-blade screwdriver
to break the gasket bond between the cover and the housing surface.
2: Allow the old oil to fully drain from the case into a catch container.
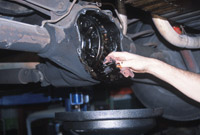
3: With a clean rag, wipe and remove any sludge and/or metal shavings from the diff housing.
|
 |
|
CC’s first quiz:
In the first installment of Colin’s Corner,
I mentioned that there might just be the odd quiz now and again.
Well, here’s the first one. This one’s a GM “general
knowledge” type quiz – nothing too earth-shaking
or mind bending, but there still may be a few that’ll
trip you up. I’m not going to supply the answers here
– that would just lead to “no cheating on this test!”
Hey, relax, it’s not a test. Just something to have fun
with – maybe something you can share with your buddies
– you know, the ones who claim to know it all! I’ll
supply the answers next CC. Have fun, and try not to use the
internet to dig up all the answers!
-
What was the last year the “Chevelle” name appeared on a Chevrolet?
-
Which 3 GM divisions utilized front wheel drive during
the 1960s and 1970s?
-
What was the largest available engine (from the factory)
in the 1970 Camaro?
-
What do the numbers used by Oldsmobile “4-4-2”
stand for?
-
What was the first year the Impala hit the road?
-
What year did Pontiac’s GTO become its own model,
and not just an “option” on the Tempest?
-
When did the name “Stingray” cease to appear
on the Corvette?
-
What year did the first “boat tail” Buick Riviera
appear?
-
What was the last year Cadillac produced a convertible?
(Modern day Caddys and modified/concept cars do not apply here!)
-
For which model year was the Monte Carlo introduced?
-
When did the first “Heavy Chevy” model arrive
on the scene? And which Chevrolet model was it based on?
-
What do the letters “GTO” stand for?
-
What model year was the 350 cubic-inch V8 introduced in
Chevrolets?
-
In 1968, what was the maximum allowable cubic-inch displacement
for the A-body line-up, as dictated by GM Corporate?
-
What was the first year Pontiac utilized the front “soft
nose” urethane bumpers?
-
What was the model name given to Oldsmobile’s “glass
paneled roof” Station Wagons during the ’60s and ’70s?
-
What was the last year for side vent windows on GM A-body
vehicles?
-
In 1970, which GM division produced the “Rallye 350”?
-
What do the words “El Camino” mean?
-
What was the name of the Chevrolet/Pontiac “half-breed”
A-body produced by General Motors of Canada during the 1960s?
|
 |
Colin’s Corner Project 1969 Buick Special Update!
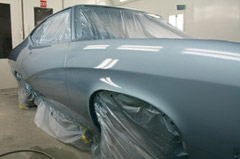
Last installment of Colin’s Corner, I showed you how my
project ’69 Buick Special was coming along (progress is
always a good thing, huh?) When we last left off, the car was
prepped, primed, sanded (about a gazillion times) and was nearing
its turn in the hallowed paint booth. Well, over the past month,
I’m happy to report that we made it! Here’s the
latest:
|
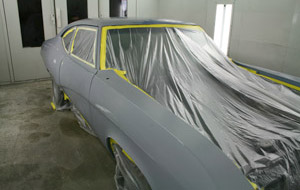
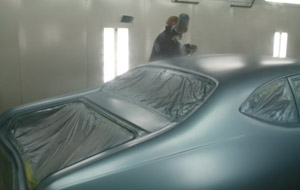
In the
booth, masked, taped, ready to rock. All of
our side glass has been removed. The windshield
and back glass is still in place, all trim/moldings
have been removed.
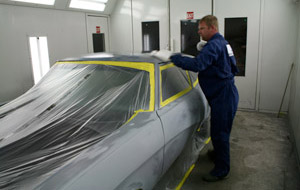
Scott Matthews at Apland’s Auto Body does one
final wipe down to remove any extraneous dust,
then hits it all with a tack cloth. A dust-free
environment is absolutely critical here.
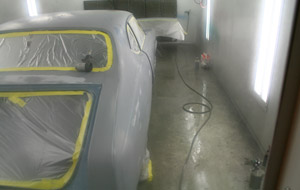
The floor is sprayed with water,
further reducing the risk of dust contamination.
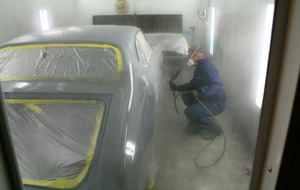
The entire car gets coated with Eastwood
brand epoxy sealer, further treating the body
and prepping it for the base coats.
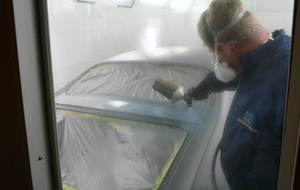
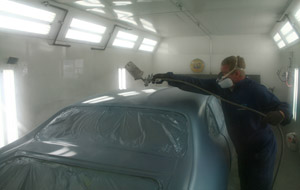
Scott begins to lay down the first coats of color.
PPG’s oil-based Deltron 2000 is used.
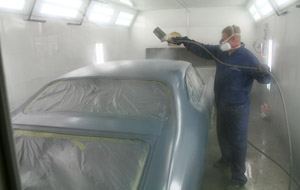
PPG’s code 2077, GM’s code 53
(1969 Buick Crystal Blue Poly). Kevin Reedy from Automotive
Paint Specialties in
Grants Pass, Oregon supplies our paint.
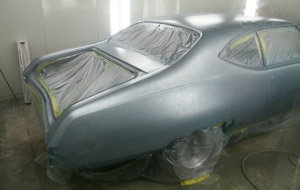
Our Buick after a single coat. Scott waits about
15 minutes between applications. The booth is
climate-controlled for optimal drying times.
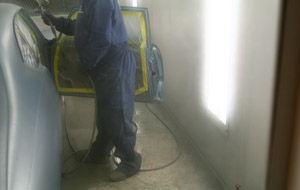
The second coat gets started by squirting the door jamb areas,
and the insides of the doors.
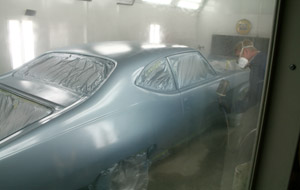
2nd, 3rd, and 4th coats are applied, again,
allowing approx. 15 minutes between coats to
ensure proper drying time.
4 coats seem to be our magic number.
Great coverage, beautiful metallic.
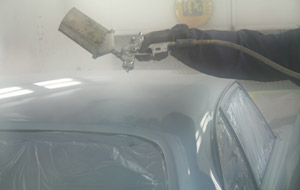
Scott lays down our first coat of Eastwood brand Clearcoat. The
paint is starting to come to life!
The entire car gets another coat of Clear,
then the deck lid, roof, and hood all get an
addtional final spray.

After another 1⁄2 hour dry time, I’m finally allowed
inside the paint booth to take some shots. Spectacular!
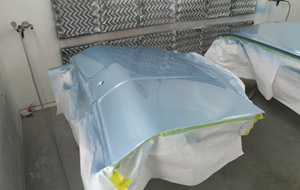
Our decklid and hood had been removed and sprayed at the same
time the rest of the car was.
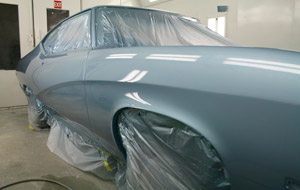
After months of prep work and a stunning paint job,
our Special is showing her true colors. Straight as
an arrow and ready to be put back together.
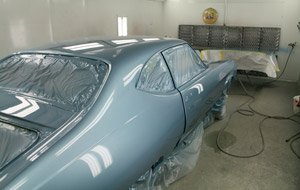
The Buick will sit at Apland’s for a few days, and then
we’ll be transporting her to a separate garage to
begin re-assembly. Stay tuned, right here at Colin’s
Corner!
Totals: 1 coat epoxy sealer, 4 coats of base color, 3 coats clear.
Total elapsed time: approx 3 hours.
Sources:
Apland’s Auto Body
2163 NE Spaulding Ave.
Grants Pass, OR 97526
(541) 244-1457
Automotive Paint Specialties
245 SE H Street
Grants Pass, OR 97526
(541) 479-5517
Eastwood Company
263 Shoemaker Road
Pottstown, PA 19464
(800) 343-9353
|
|